Create Your First Guitar Tab
This page will guide you through creating your first guitar tab in My Guitar Tabs. You’ll learn how to set a title, insert and delete notes, add special notations (markings), undo and redo changes, and save your song. By the end of this guide, you’ll have a complete tab ready to use, share, or refine further.
Accessing the Editor
To start creating your first guitar tab, you’ll need to navigate to the editor page. Follow these steps:
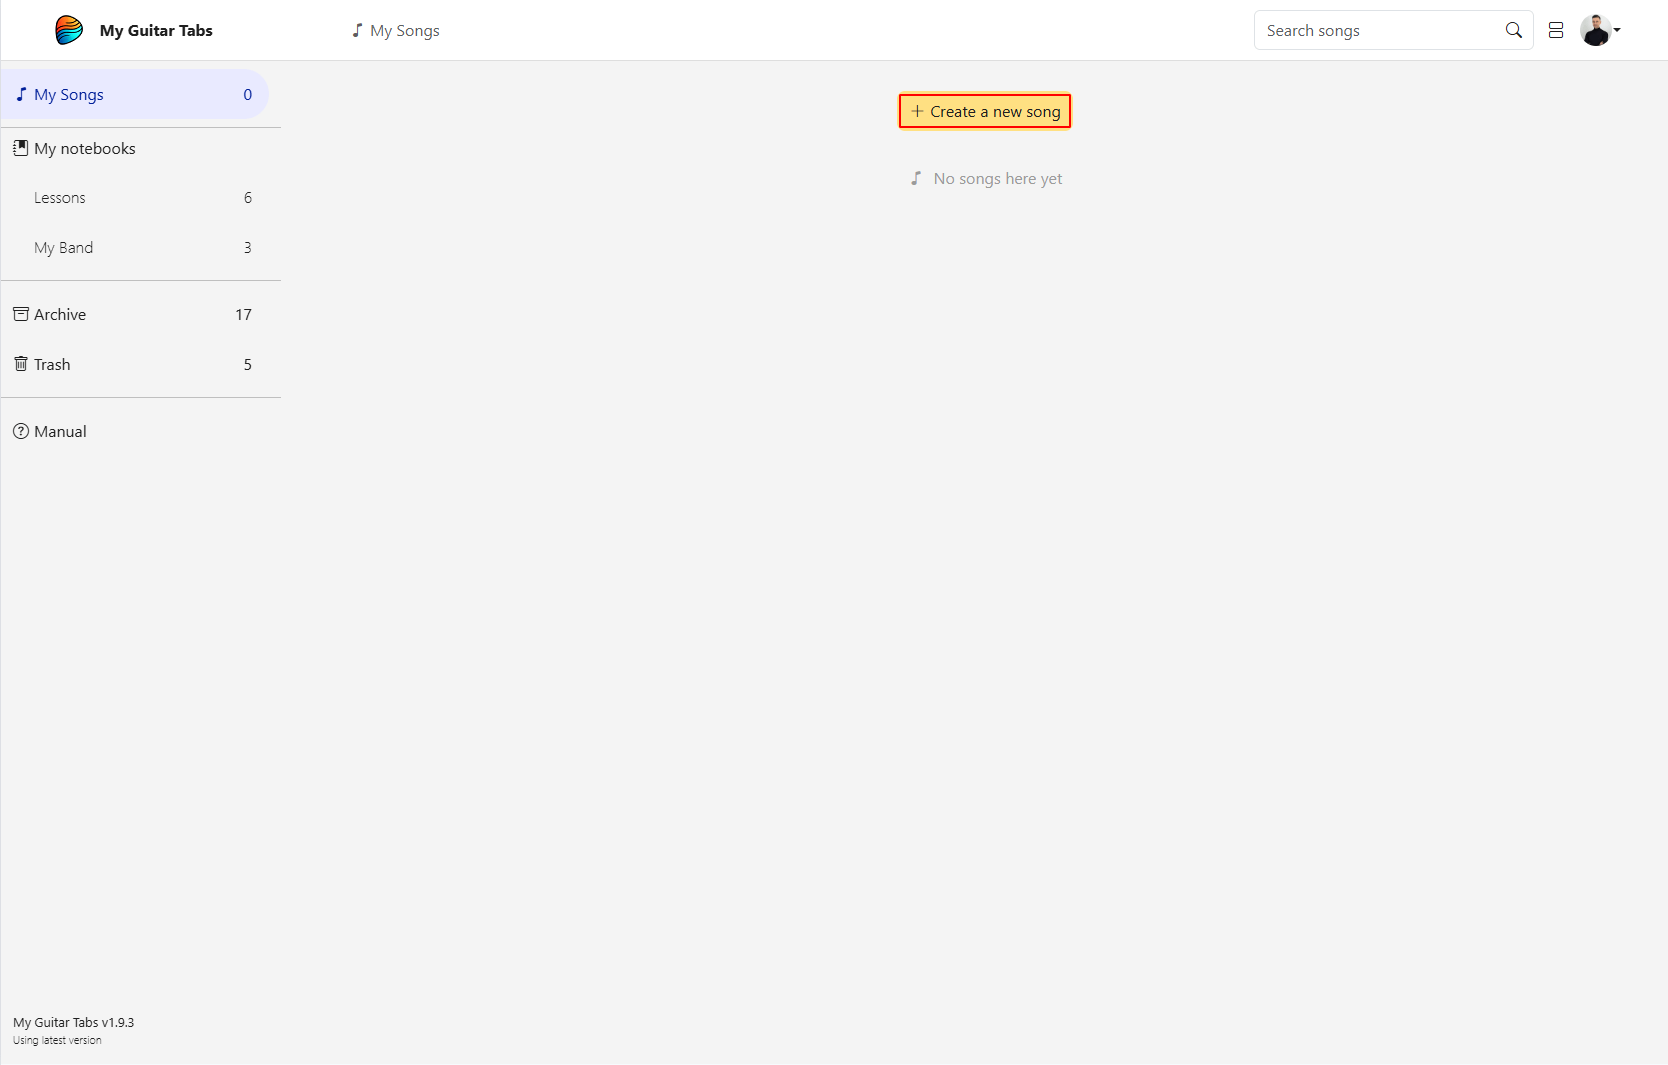
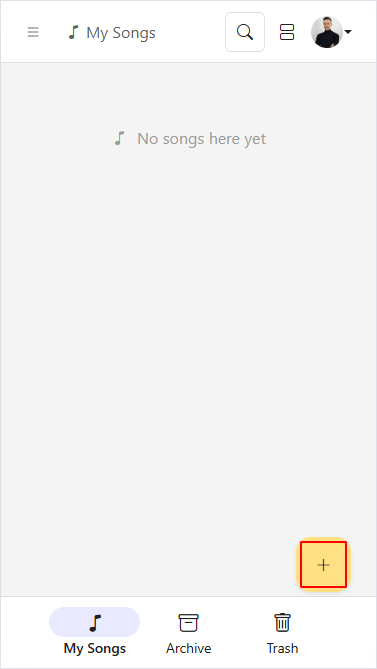
- Open My Guitar Tabs and go to My Songs page.
- Press the Create New Song button.
- You’ll be taken to the editor page, where you can begin creating your tab.
- Desktop
- Mobile
Using the Editor
The editor is your platform for creating and editing guitar tabs. When using the editor, you’ll notice that the strings are displayed as dotted lines. This indicates that you are in editing mode, as opposed to the classic straight lines displayed in the viewer.
- Desktop
- Mobile
On desktop devices, the virtual keyboard is collapsed by default. If you’re working with a physical keyboard, you can input notes directly without needing the virtual keyboard.
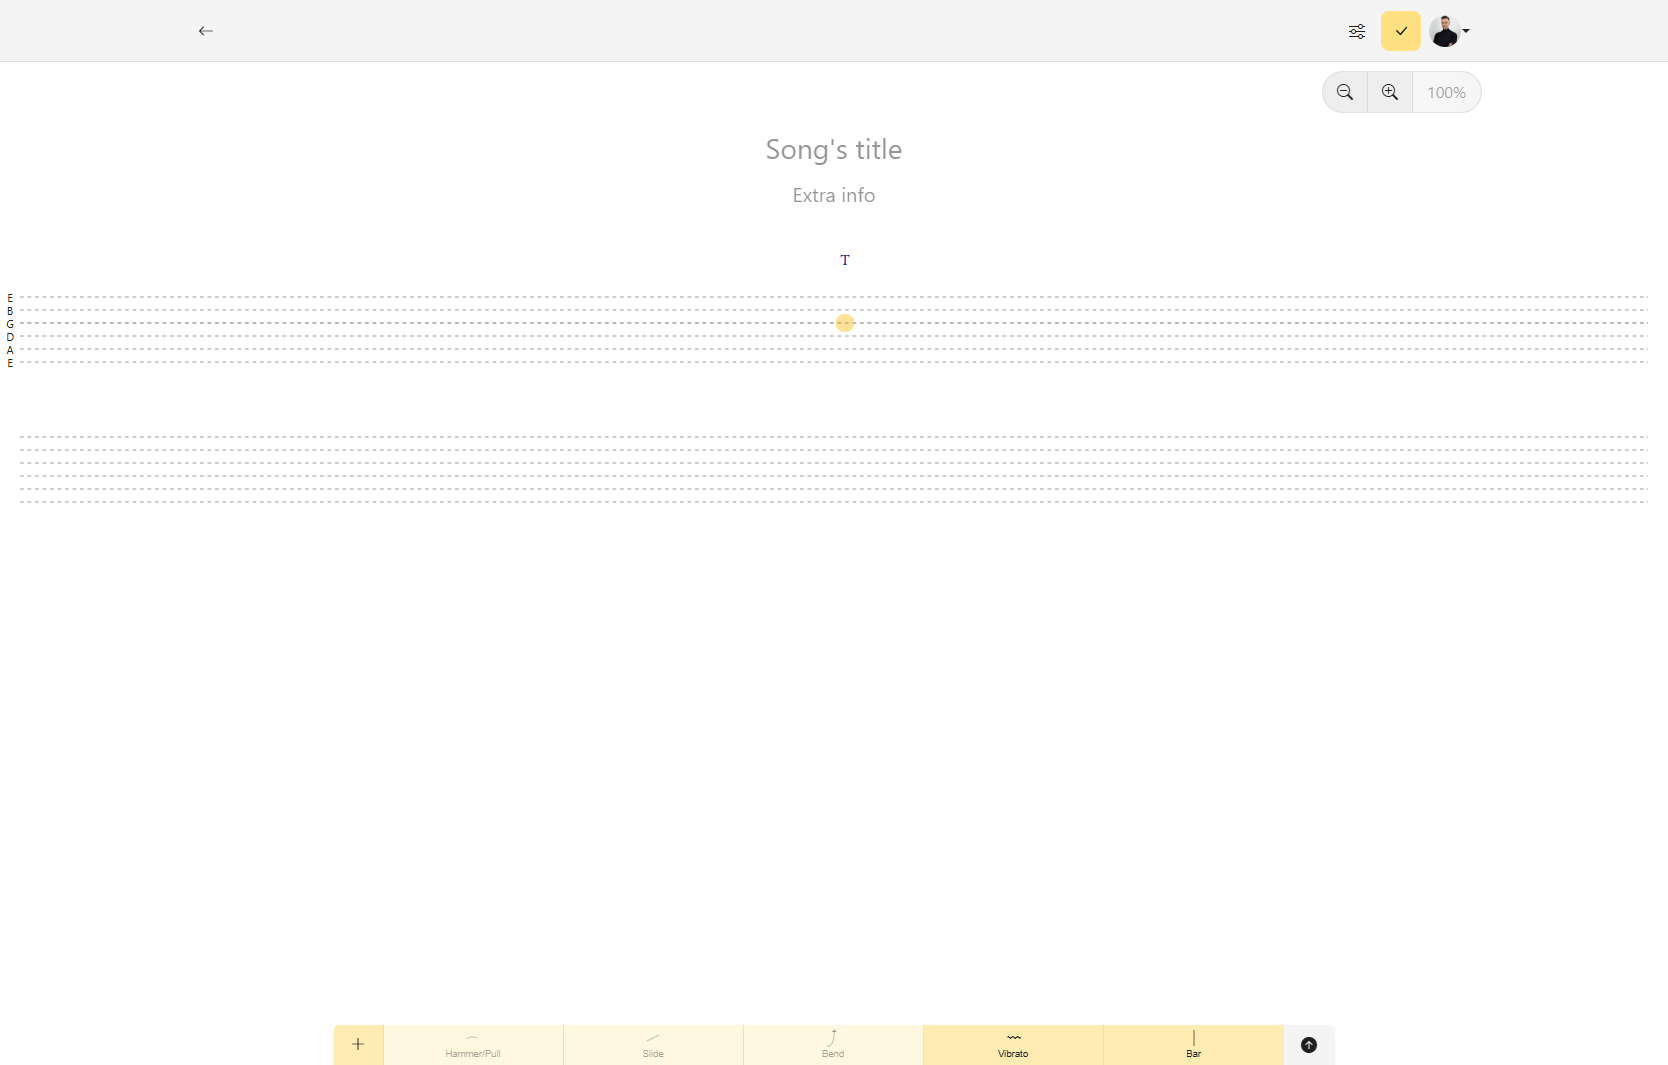
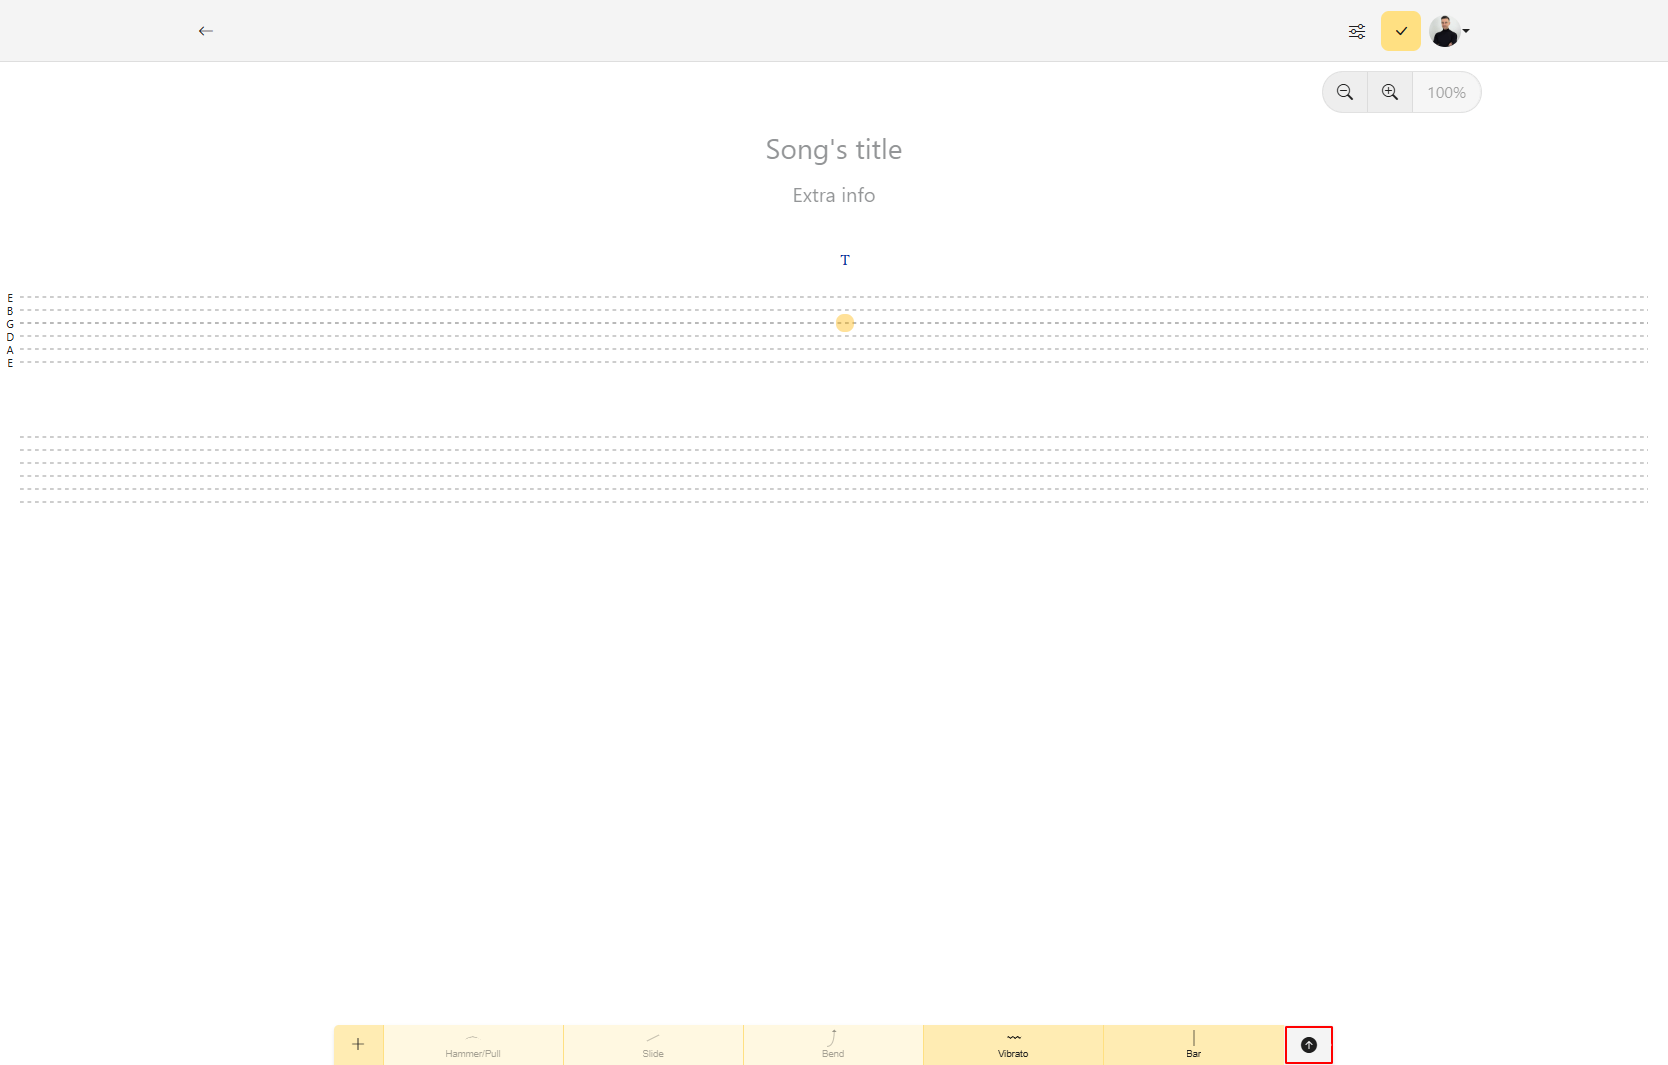
To access the virtual keyboard, press the Expand Keyboard button.
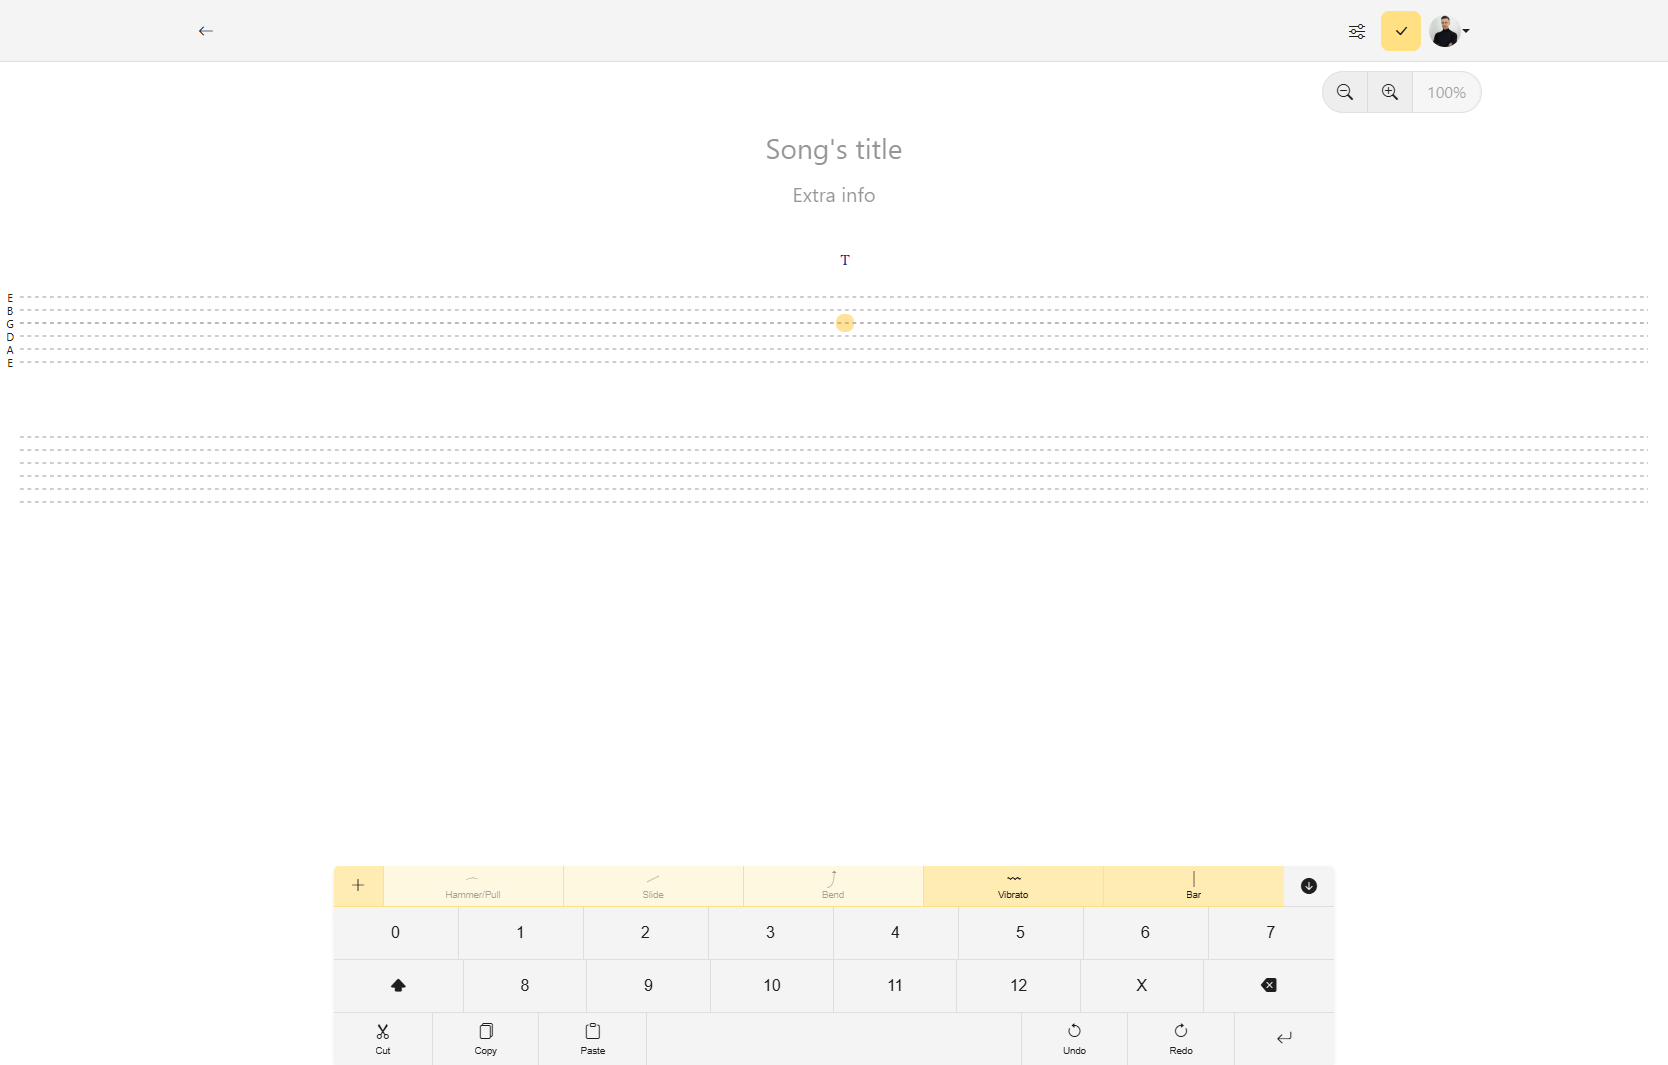
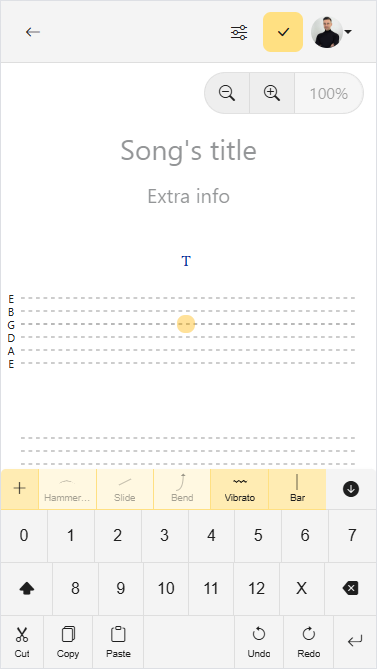
On mobile devices, the virtual keyboard automatically shows when you tap anywhere on the tablature. This keyboard makes it easy to input notes and special markings without needing additional hardware.
Add a Title and Extra Information
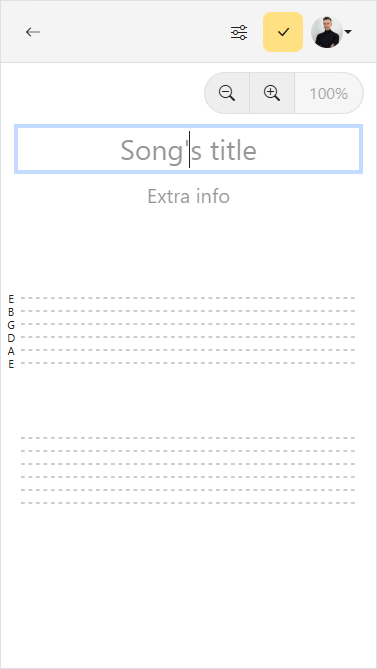
Let’s start your first guitar tab by adding the song information. Here’s how you give it a title and some extra details:
- Tap on "Song’s Title" at the top of the editor page.
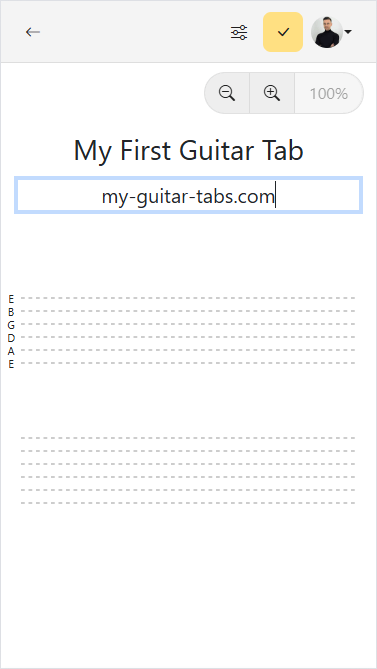
- Write the title that best represents your song.
- You can also add optional details, like the artist’s name or the tuning, to make your tab more complete.
Write your First Chords
In My Guitar Tabs, chords are written from top to bottom and left to right. You can also move the cursor to any position by pressing directly on the tablature. The virtual keyboard includes navigation keys to help you move the cursor.
If you are using a physical keyboard, you can also use these same keys along with the arrow keys.
Follow this step-by-step guide to start writing your first chords:
Write Chords
- Desktop
- Mobile
- Press where you want to add the first note. The cursor will highlight the selected note.
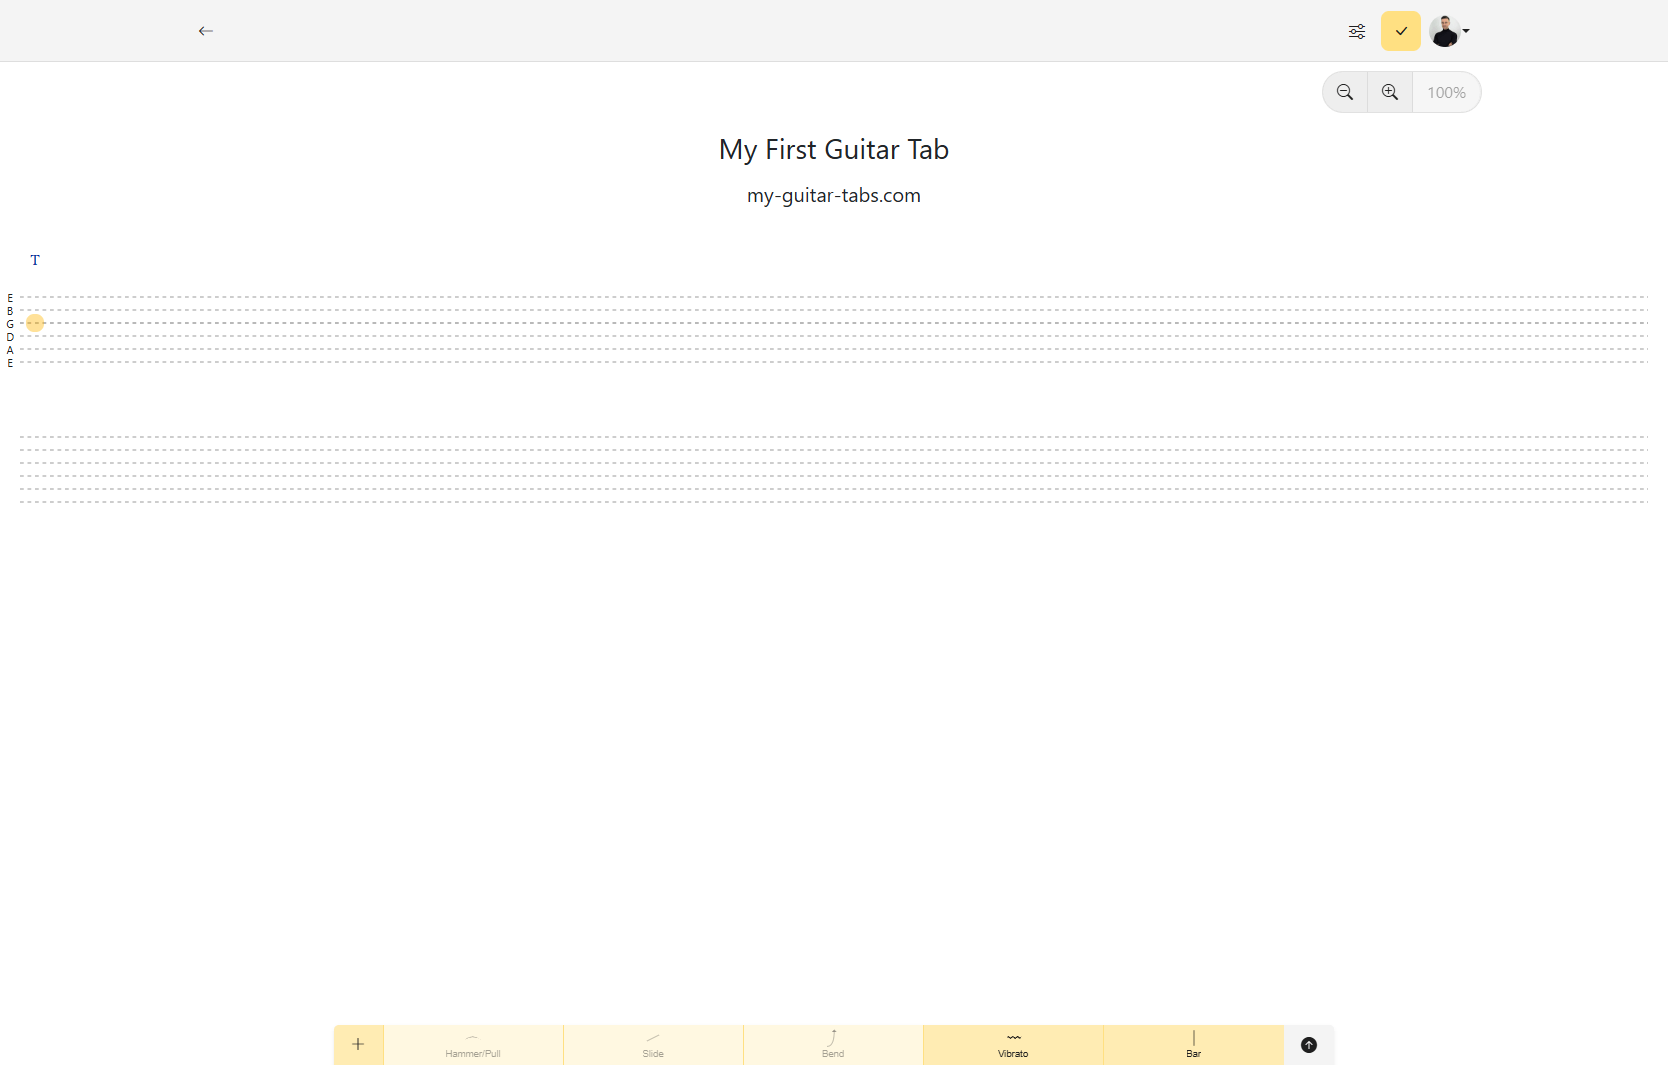
- Enter the fret number typing in in your keyboard.
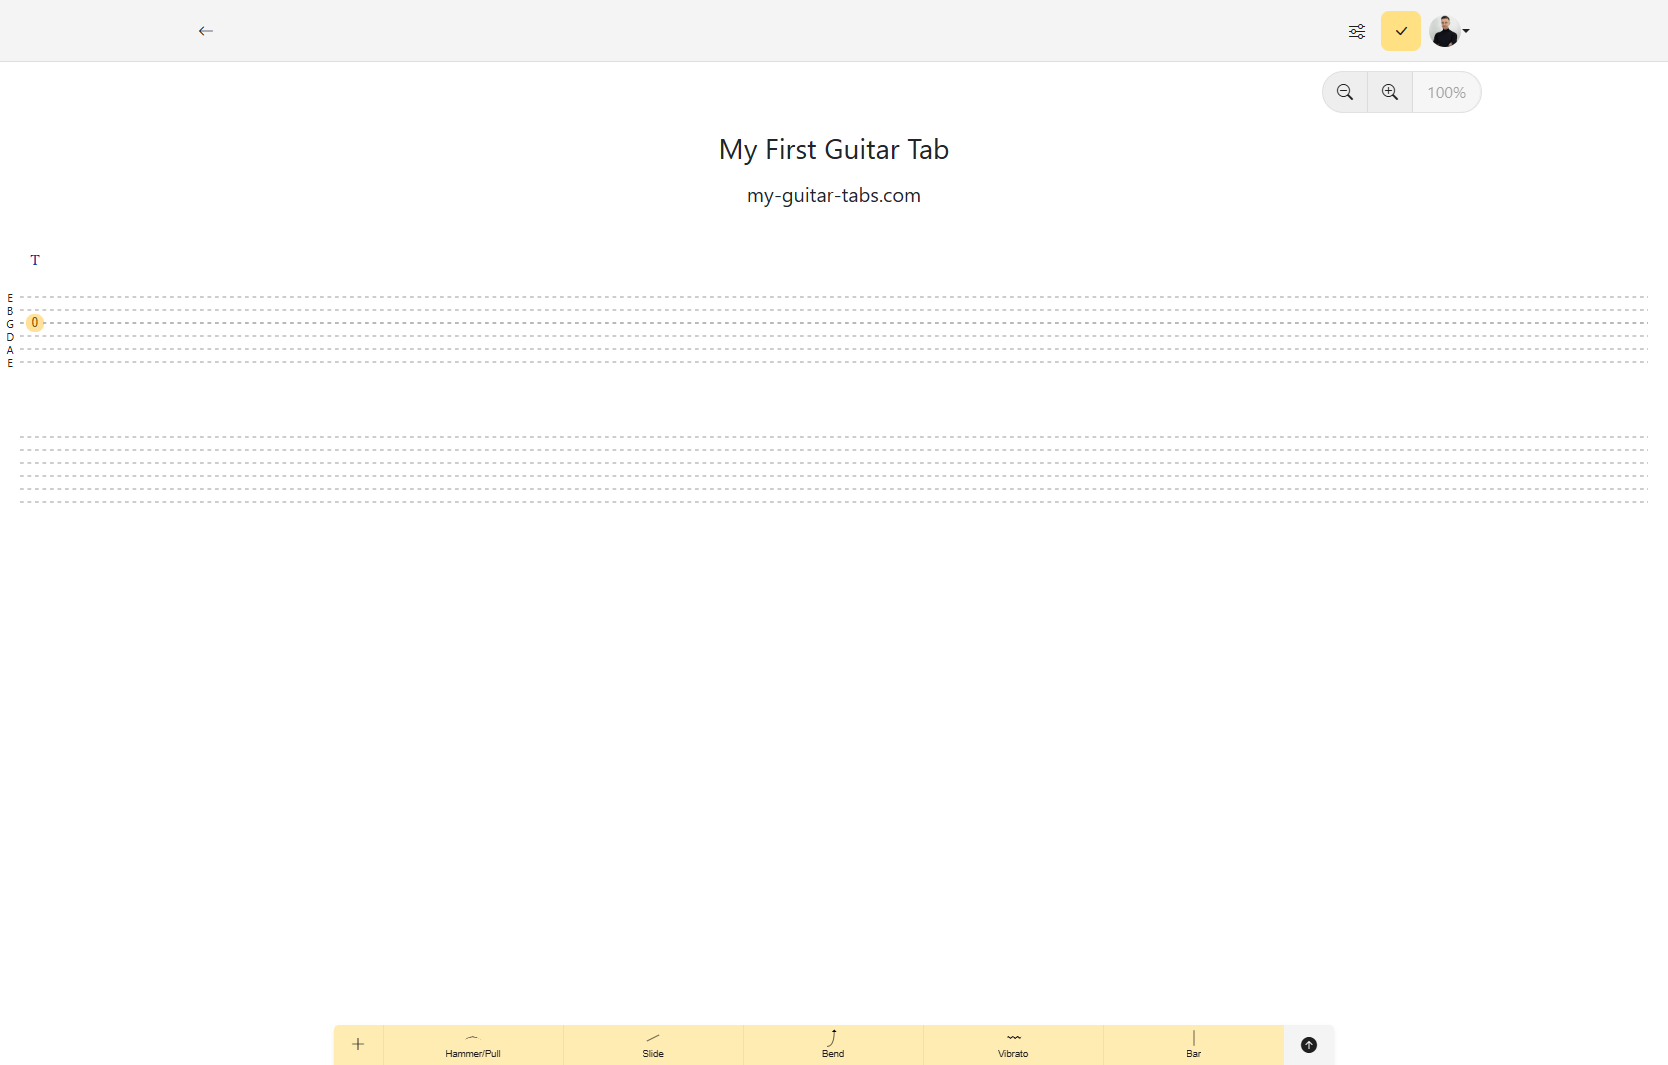
- Press Space or Arrow Down in your keyboard to move to the next string. Do it twice.
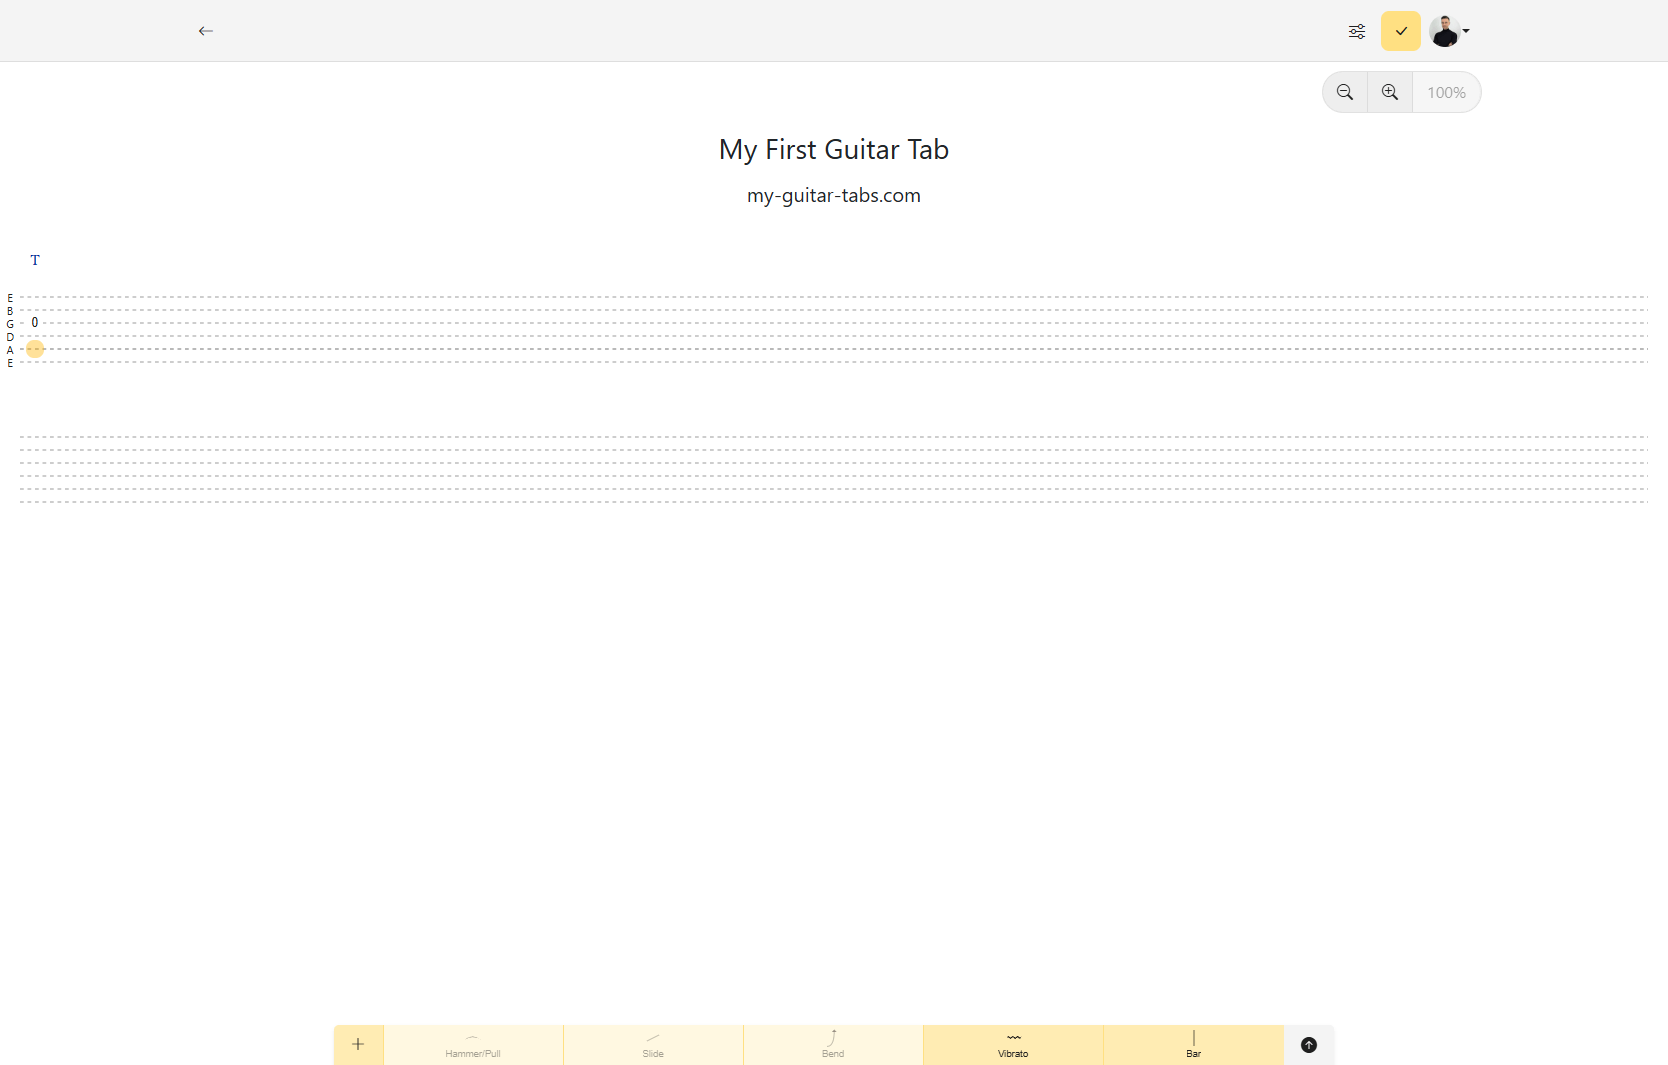
- Enter another fret number for this string, to be played along with the previous one.
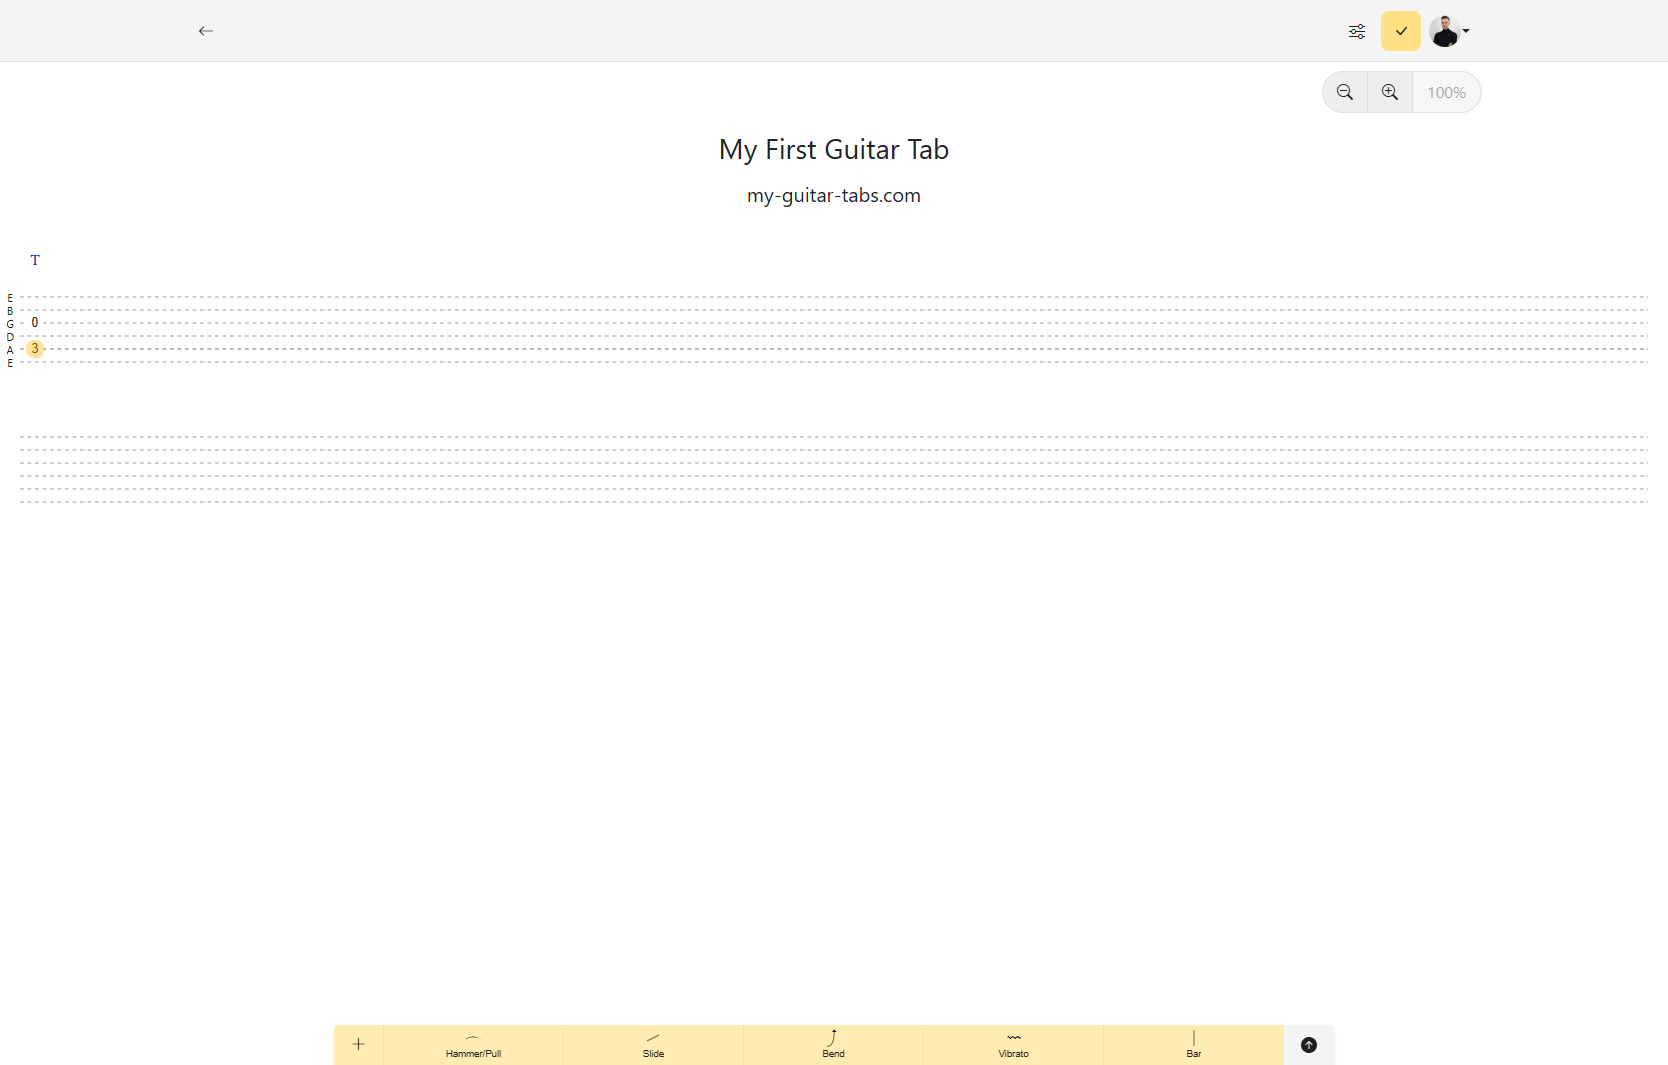
- Press Enter in your keyboard to jump to the beginning of the next chord.
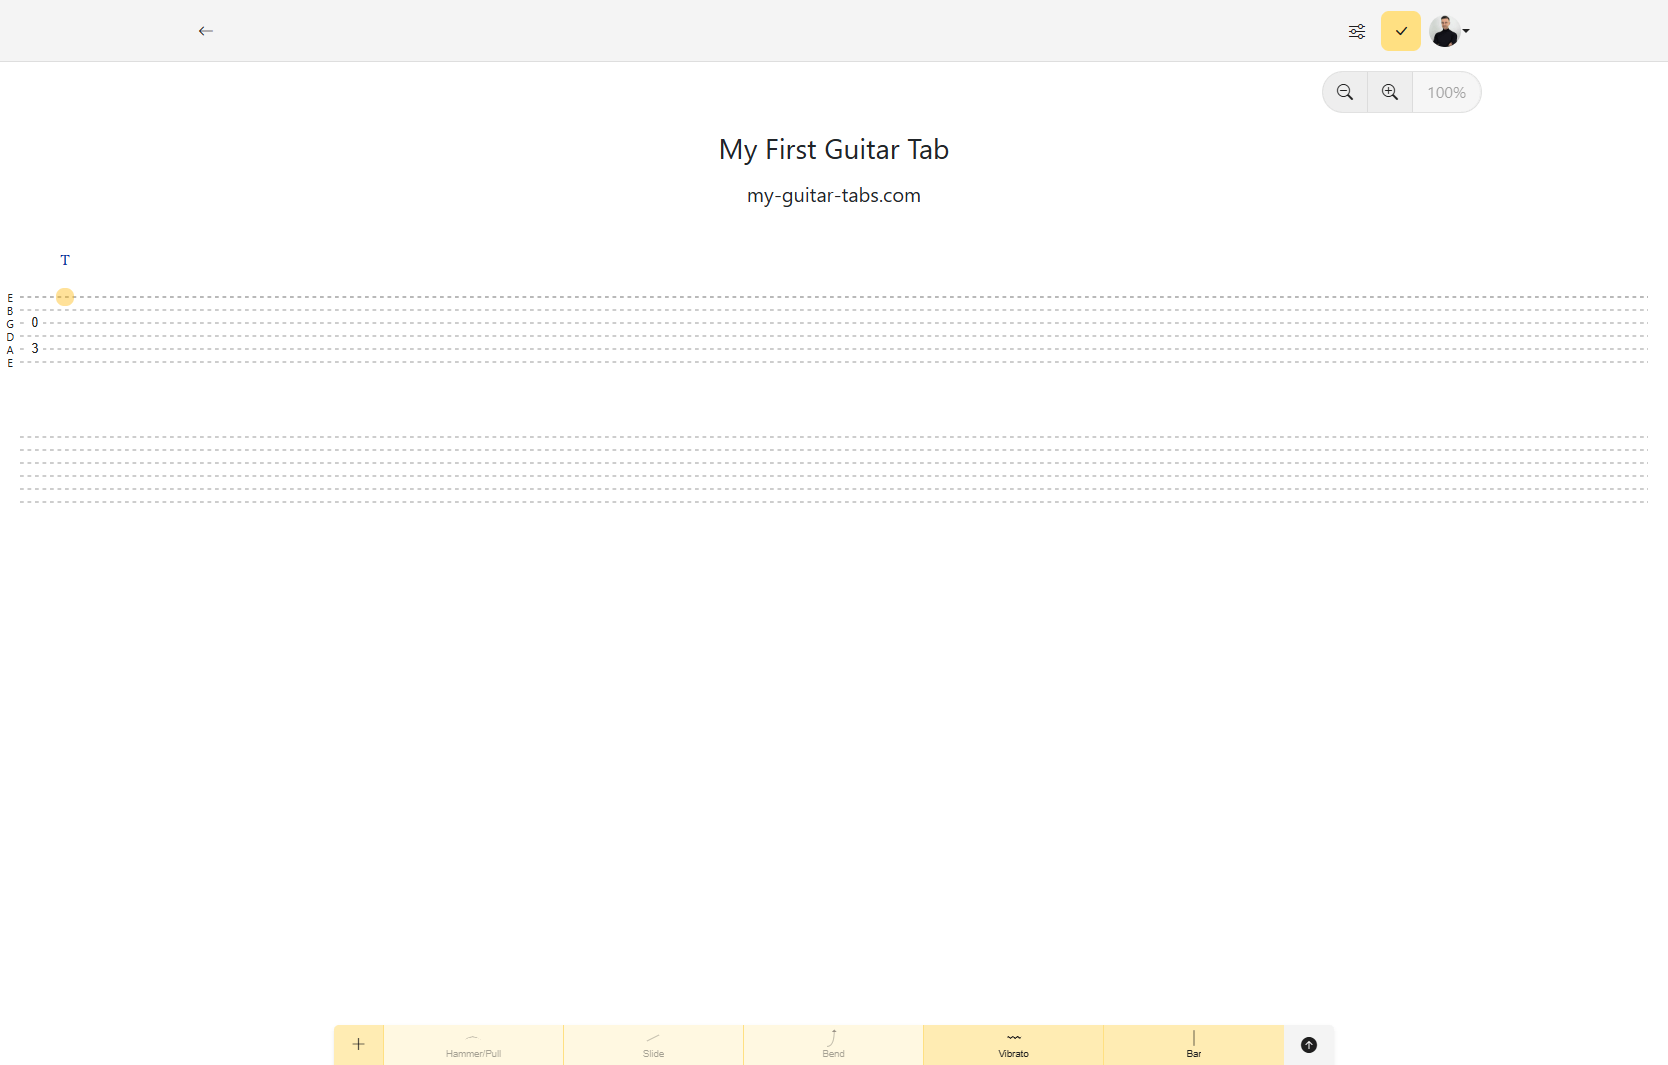
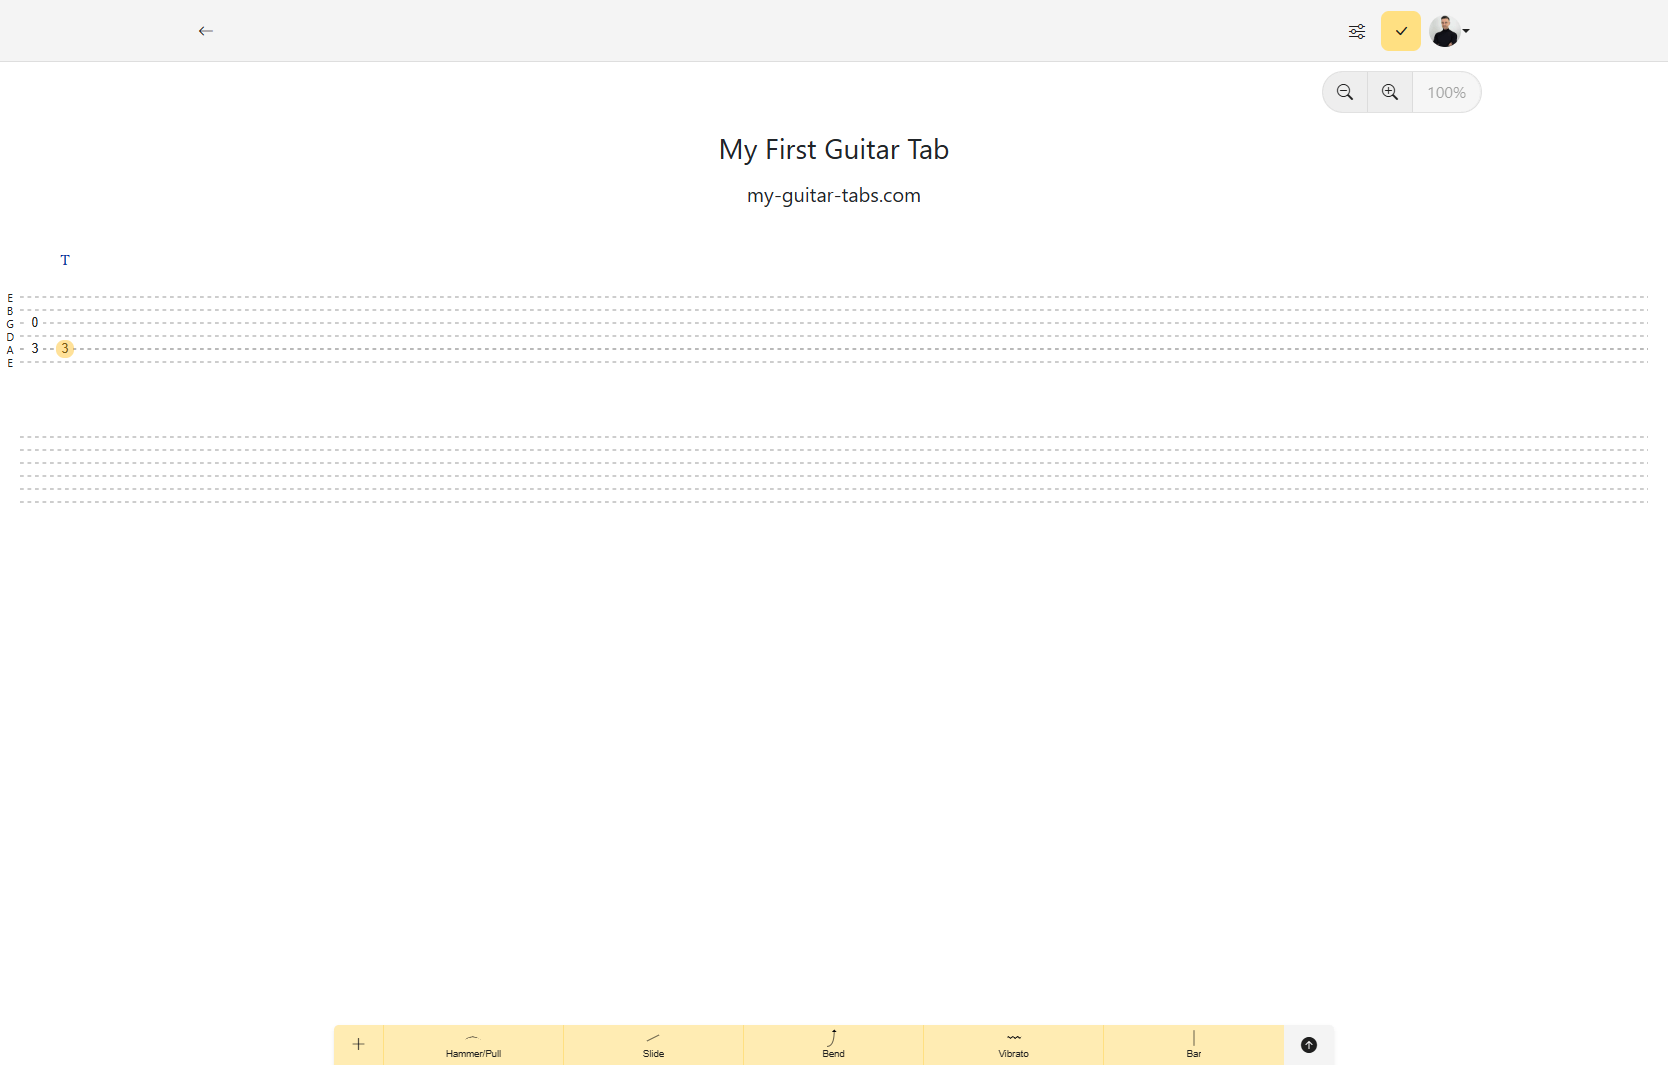
- Press Space or Arrow Down in your keyboard to move the desired string and enter a fret for this new chord.
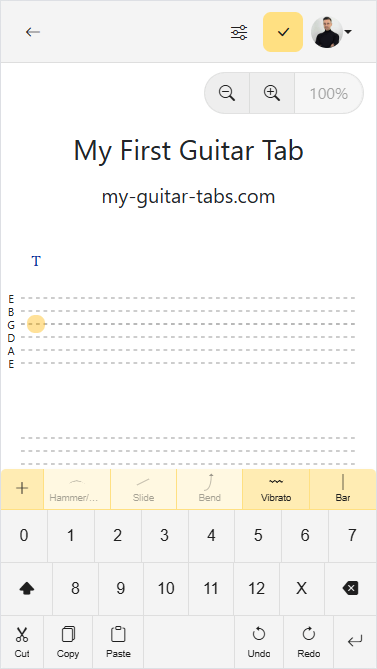
- Press where you want to add the first note. The cursor will highlight the selected note.
- Enter the fret number using the virtual keyboard. The cursor will automatically move to the next string.
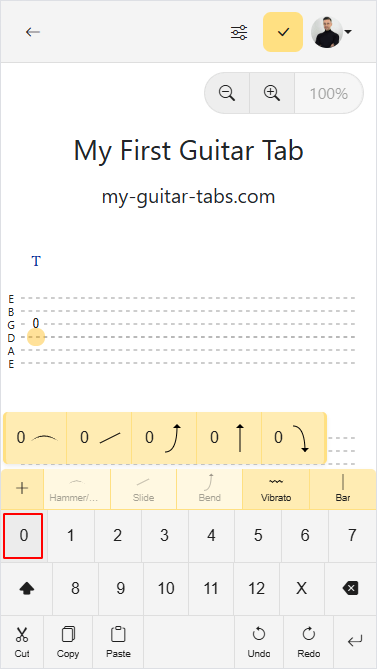
- Press Space using the virtual keyboard to move again to the next string.
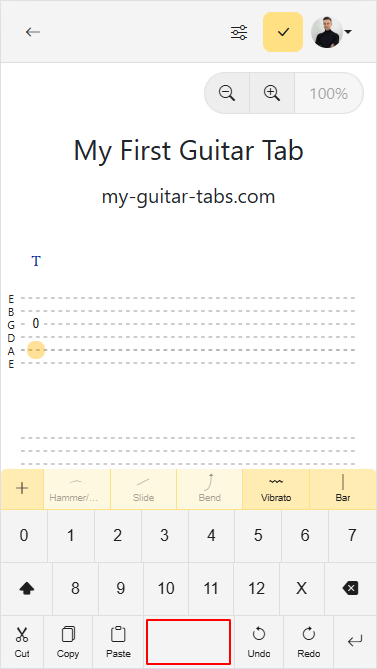
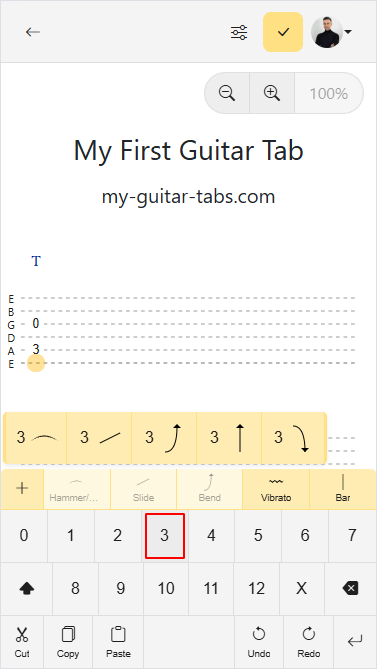
- Enter another fret number for this string, to be played along with the previous one.
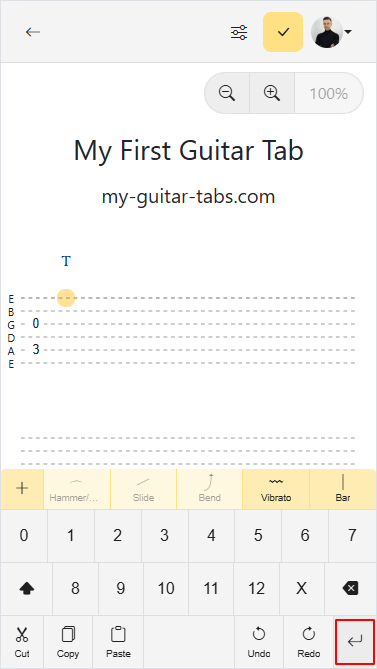
- Press Enter using the virtual keyboard to jump to the beginning of the next chord.
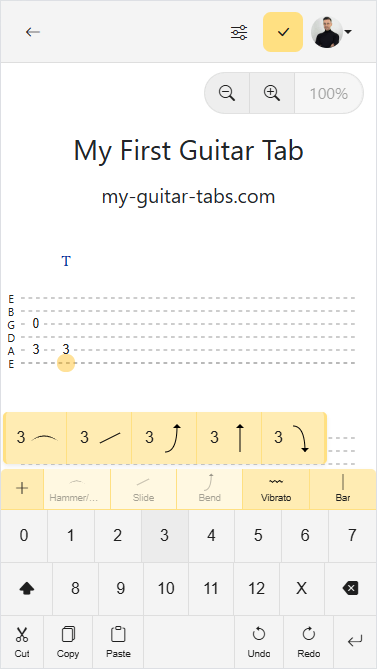
- Press Space using the virtual keyboard to move the desired string and enter a fret for this new chord.
Insert Chords in Between
We missed a chord in between the first two chords. Let’s add it now:
- Navigate to the chord before where you want to insert the new one.
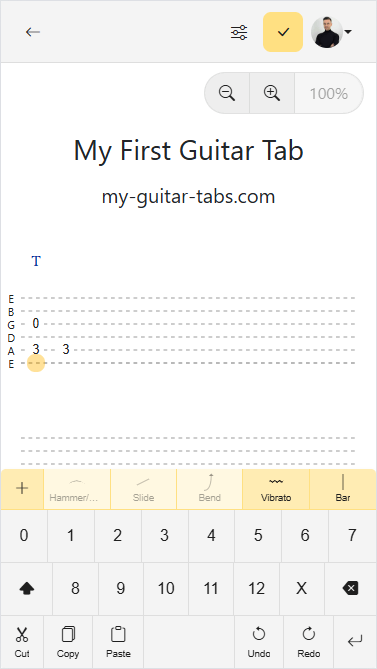
- Press Enter, the cursor will be moved to a new chord, pushing the next note, moving the rest of the song:
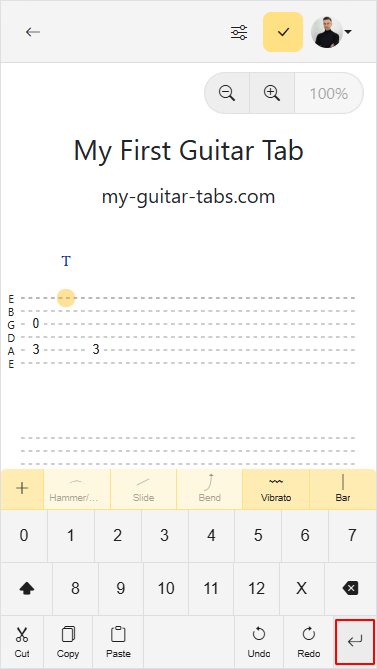
- Write your note.
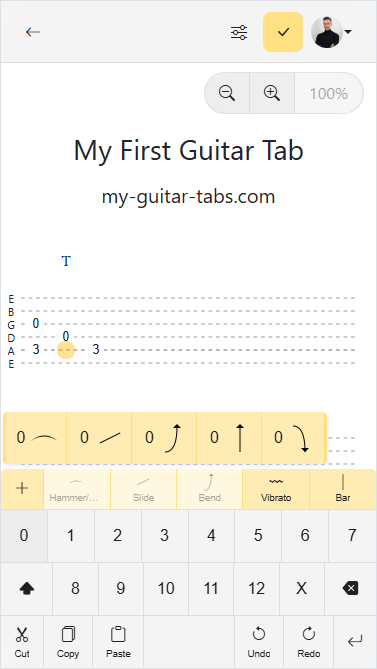
Shift Octave
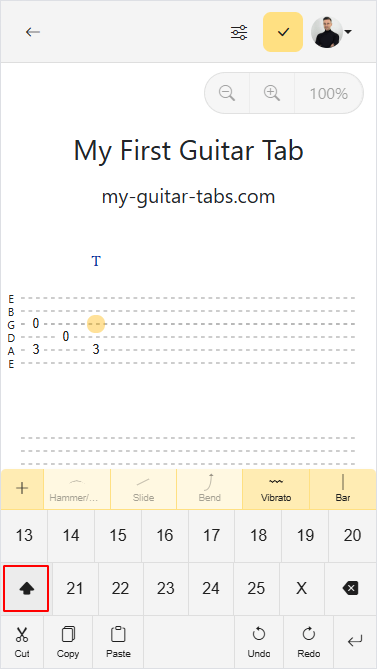
While using a physical keyboard, you can type any Fret Number directly. However, using the virtual keyboard you only have access to fret numbers between 0 and 12. To write notes in higher octaves, you can use the Shift key to Shift Octave, this will change the keyboard and access higher fret numbers. Press the Shift key again to return to the default keyboard.
Delete
Delete Notes
- Select the note you want to delete.
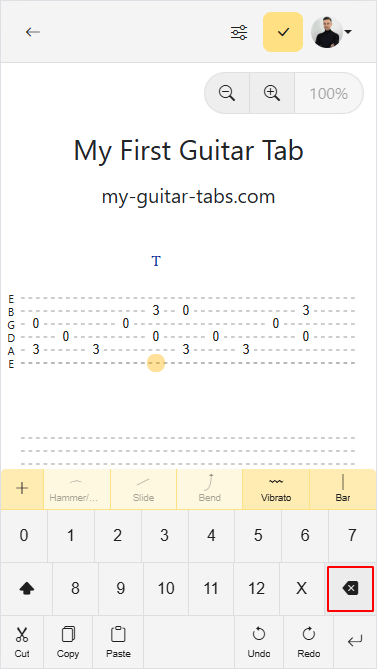
- Press the Delete button at the virtual keyboard.
- The note will be deleted, and the cursor will automatically move back to the previous string:
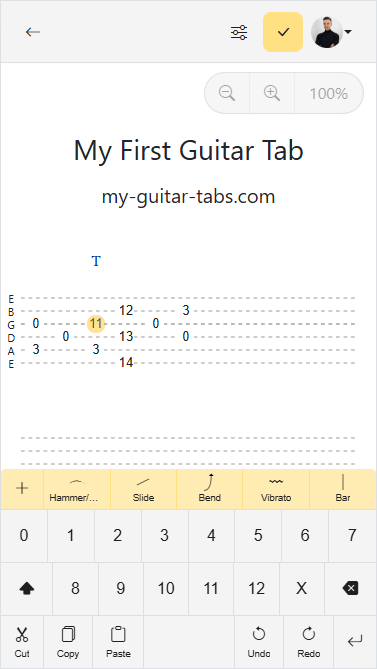
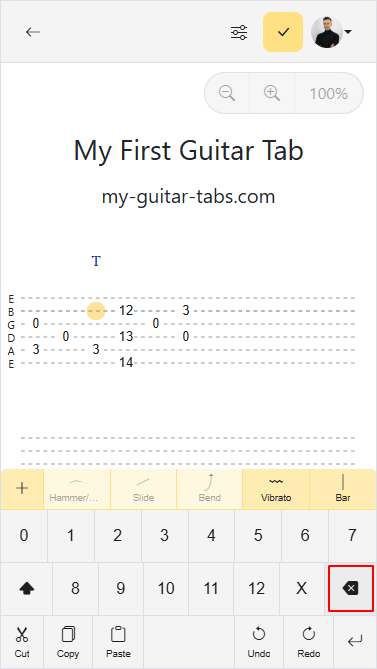
If you are using a physical keyboard, you can press the Backspace key to remove the note and move the cursor back 1 string or press Delete to remove the note without moving the cursor.
Delete a Chord
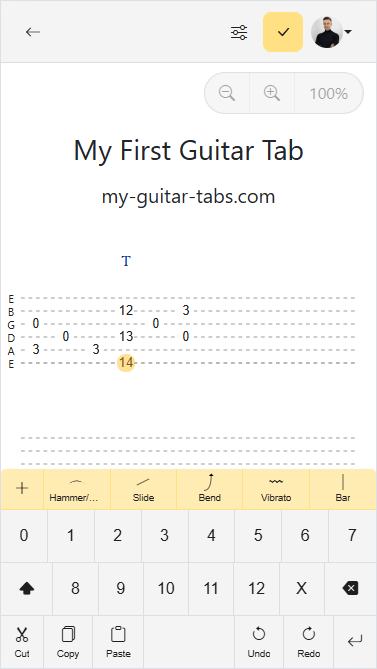
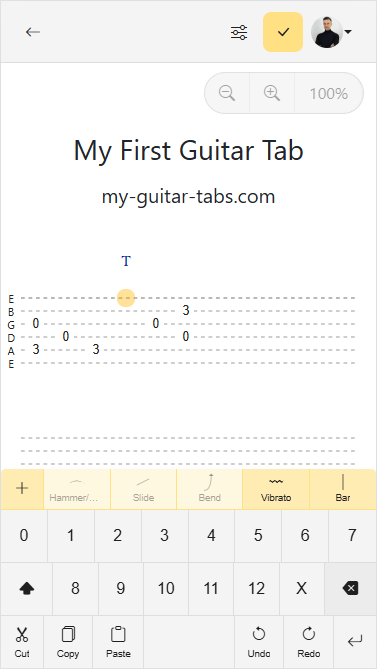
- Delete all other notes in the chord.
- Set the selection at the first string of the cord.
- Press the Delete button at the virtual keyboard (or Backspace at your physical keyboard)
- The chord will be deleted, and the cursor will automatically move back to the previous chord
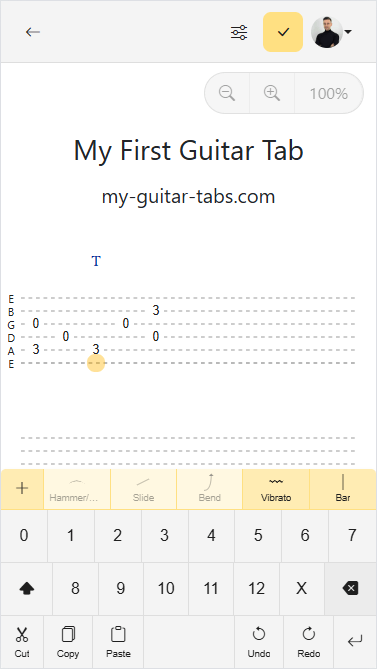
Delete a Section of the Song
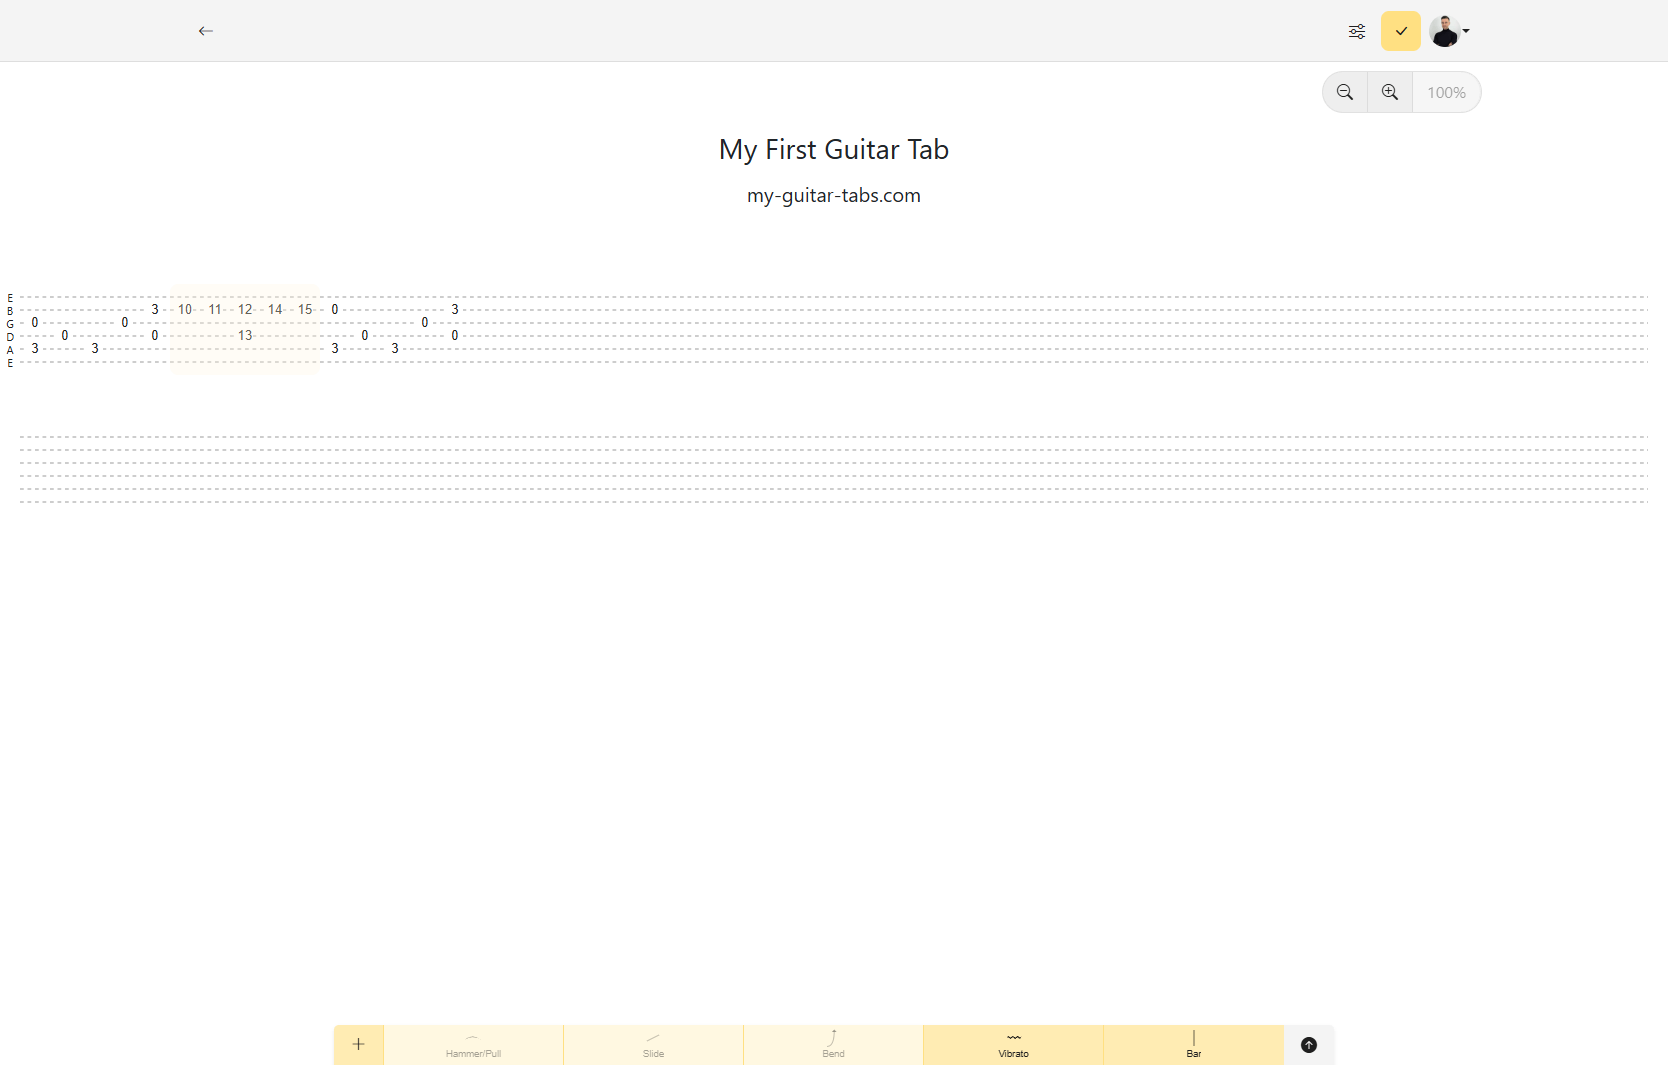
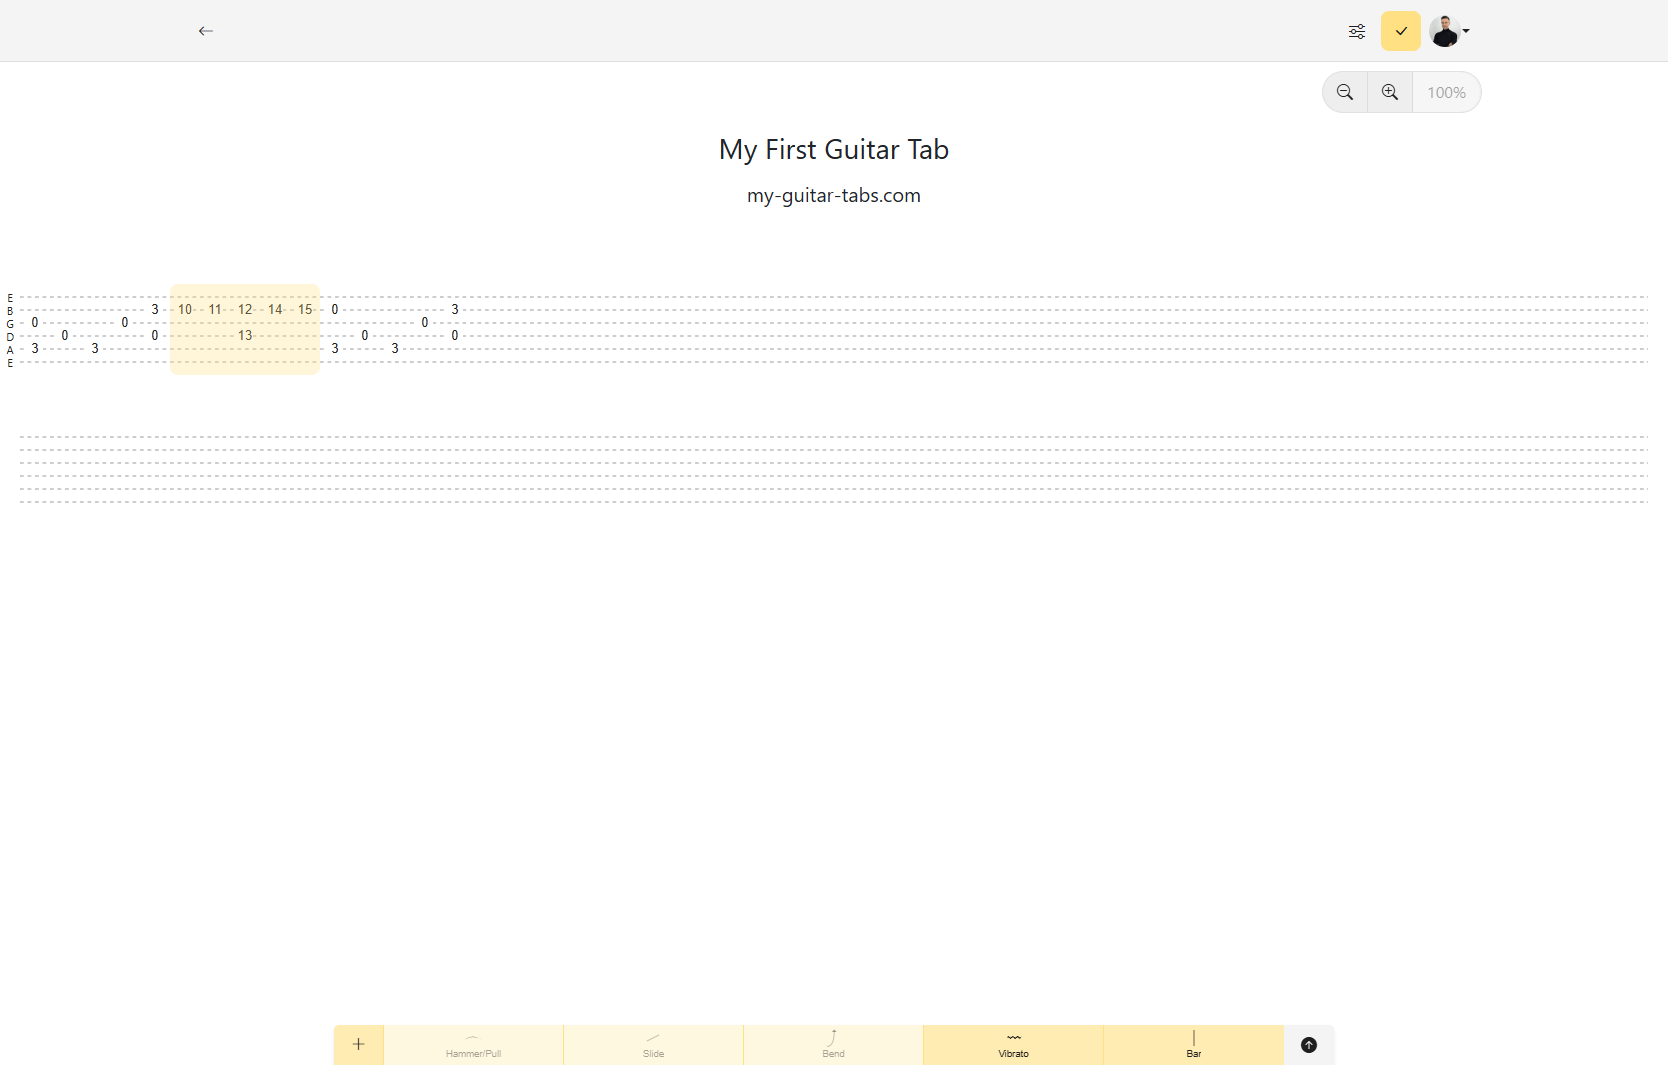
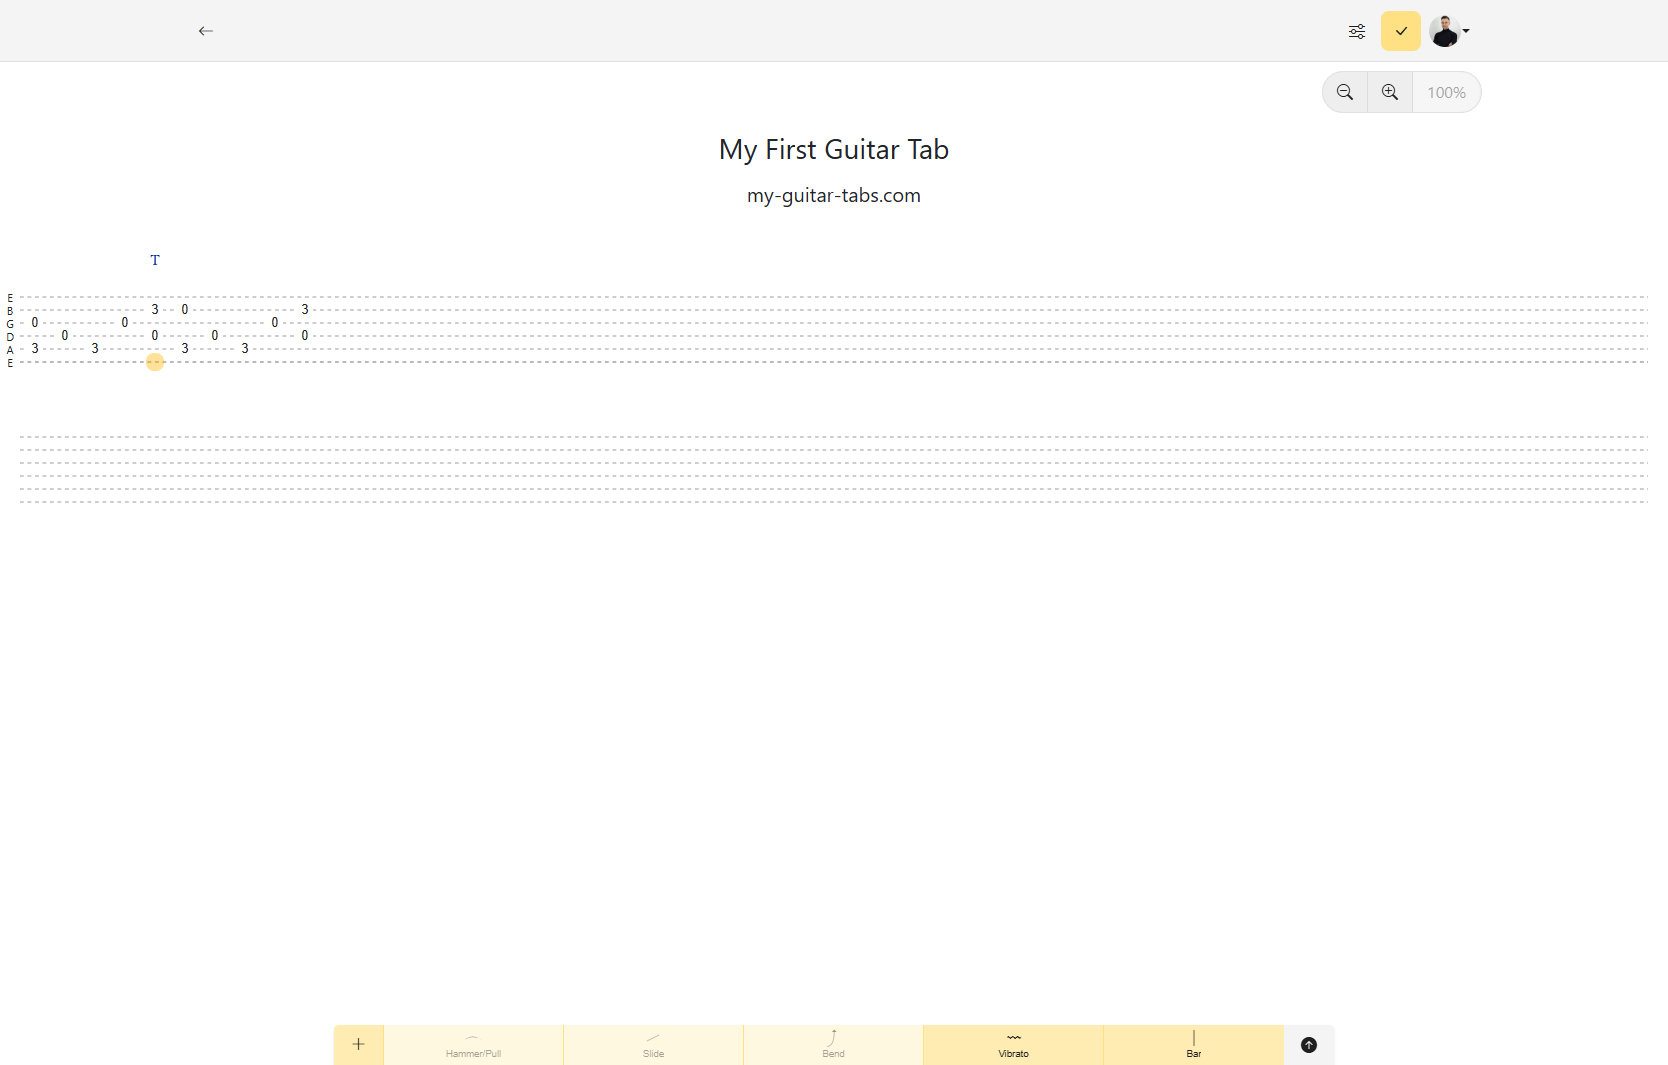
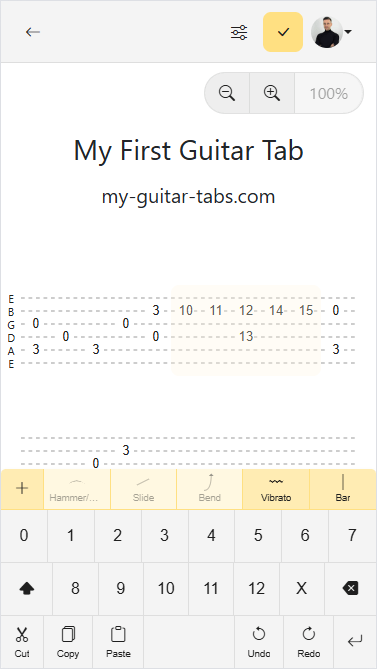
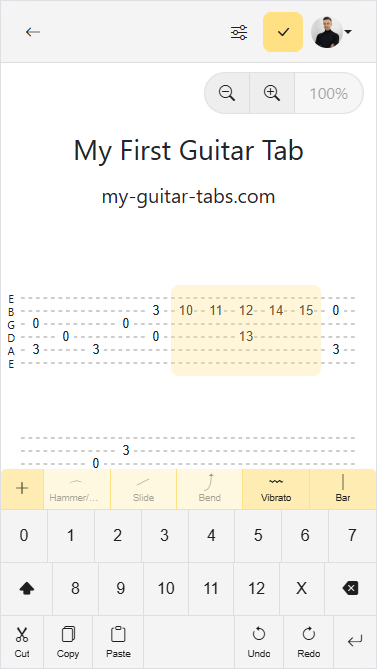
You can delete or replace entire sections of the song by selecting a range of chords.
- Desktop
- Mobile
- Press the first chord you want to delete (the selected string is irrelevant).
- Drag the cursor to the end of the section you want to remove. You’ll see a faint highlight of the selected section.
- Once you release the cursor, you’ll see the selected range highlighted.
- Press Backspace, Delete, or Enter at your physical keyboard to remove the selected section:
- Select the first chord you want to delete (the selected string is irrelevant) and hold for a second until the whole column is slightly highlighted.
- Drag to the end of the section you want to remove. You’ll see a faint highlight of the selected section.
- Once you release the finger, you’ll see the selected range highlighted.
- Press Delete or Enter at the virtual keyboard to remove the selected section.
Adding Special Notation
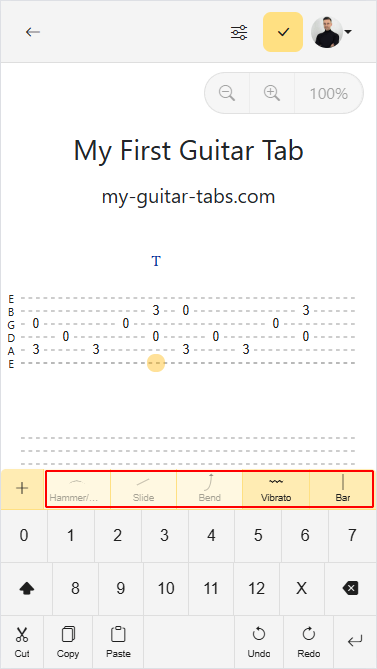
You can incorporate additional notation into the tablature using the Markings Shortcuts Bar. This bar includes the most common special markings, such as hammer-ons, pull-offs, slides, and more.
Bar Lines
Now that we have some chords, it is time to add bar lines to separate the compases:
- Select a string on a chord where you want to insert the bar line (the selected string is irrelevant).
- Press the Bar Line button on the Markings Shortcuts Bar.
- The bar line will be inserted at the selected chord.
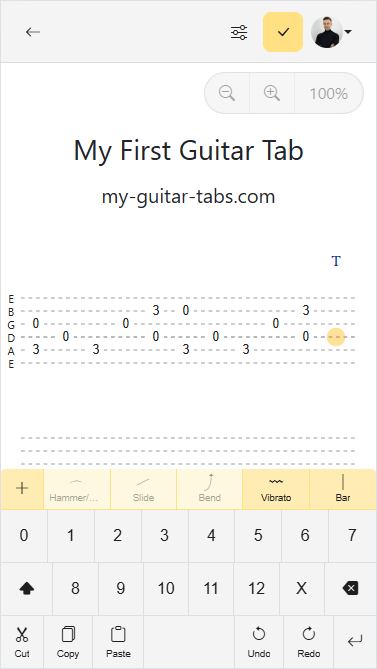
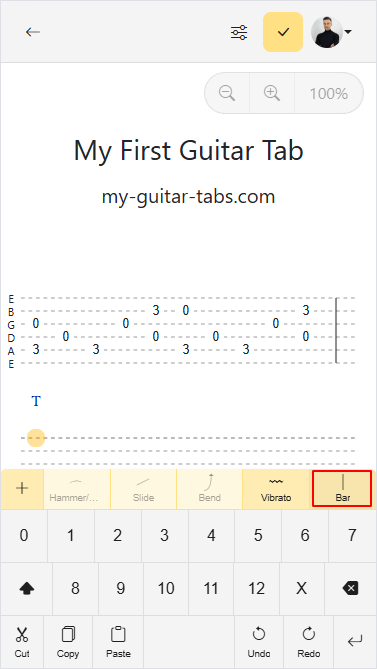
You can also insert bars in between chords. The bar line will be added after the selected chord.
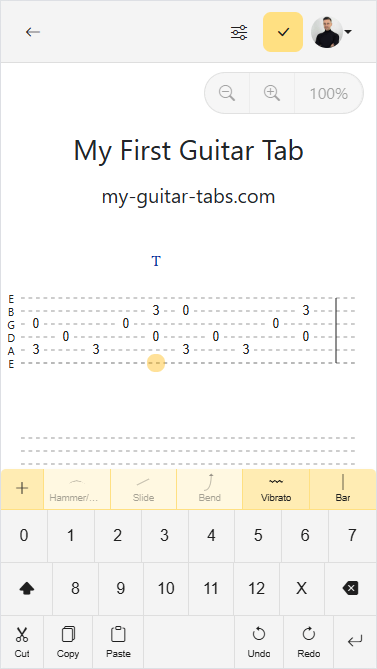
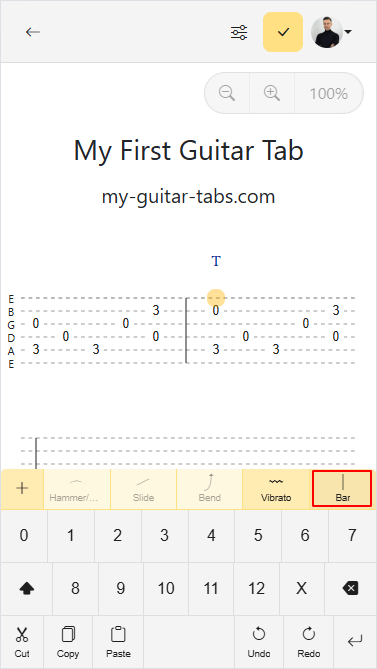
As you continue writing your guitar tab, you’ll notice that the editor automatically wraps the chords to the next line as needed, depending on the screen size.
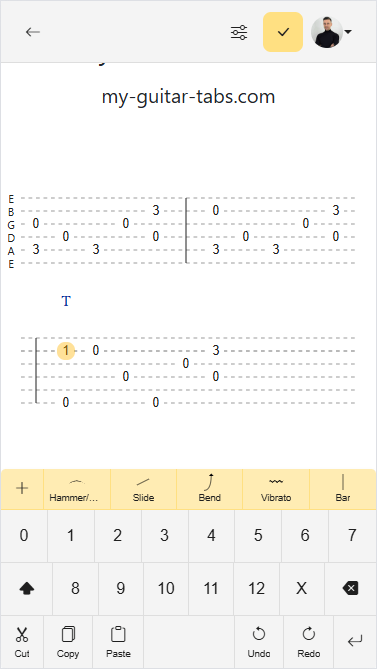
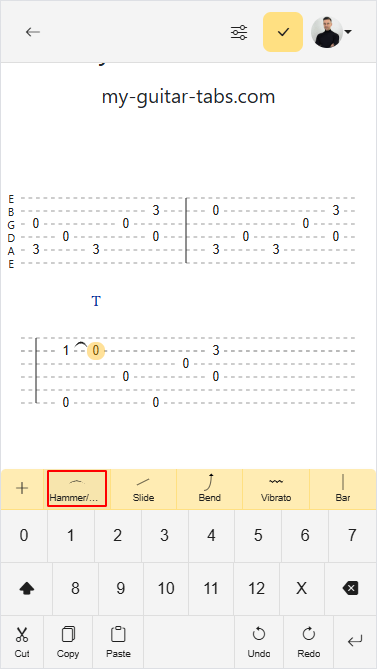
Hammer-on
Let’s add a hammer-on to the next notes in your guitar tab:
- Select the note to which you want to apply the Hammer On.
- Select the hammer on marking from the Markings Shortcuts Bar.
- The hammer-on will be added to the selected note.
Combine Markings
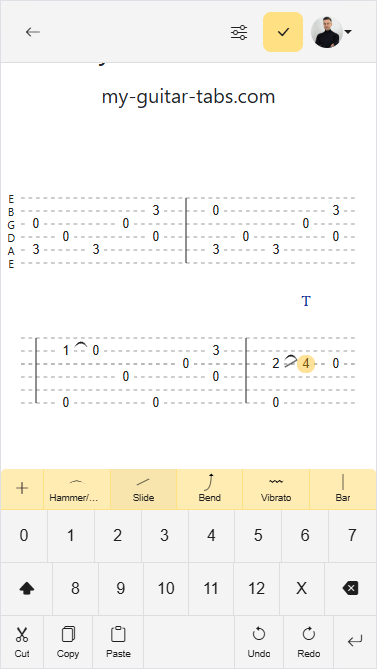
Some markings can be combined with others, for example hammer-on and slide.
More Markings
If you want to use a marking that is not available in the Markings Shortcuts Bar, you can use the Markings Keyboard to access all available markings.
Each marking represents a specific technique, and some may have unique behaviors or options. For more information on each element, refer to Guitar Tablature Notation for additional details.
Annotations
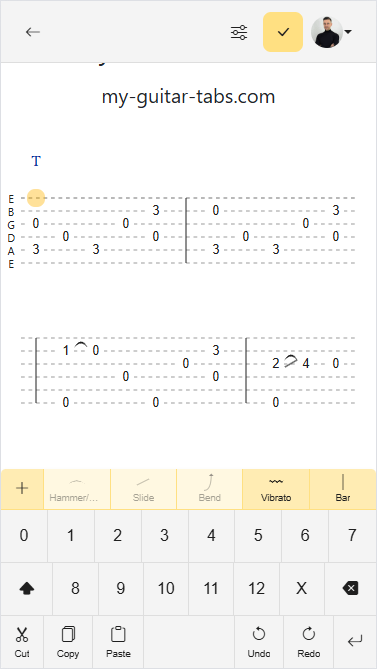
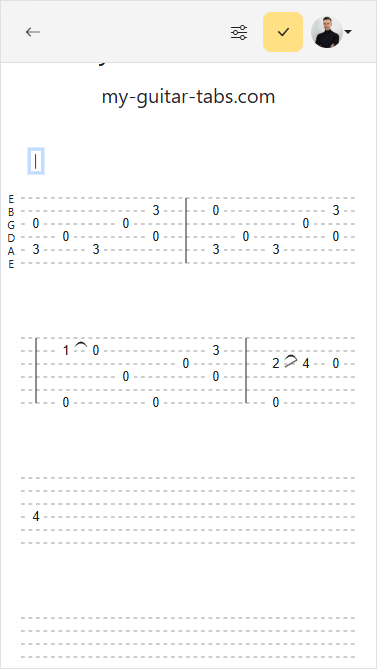
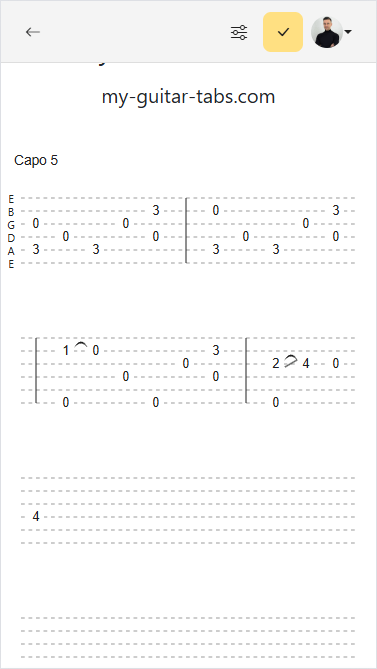
You can use annotations to add information to your song. Let’s add an annotation to show that our guitar tab should be played with a Capo. fret 5.
- Select a string on a chord where you want to insert the annotation (the selected string is irrelevant).
- Press the Annotation (T) button over the chord.
- Write the annotation text.
Tuning
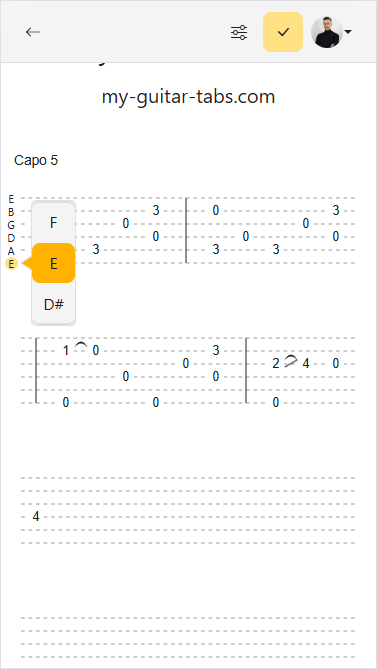
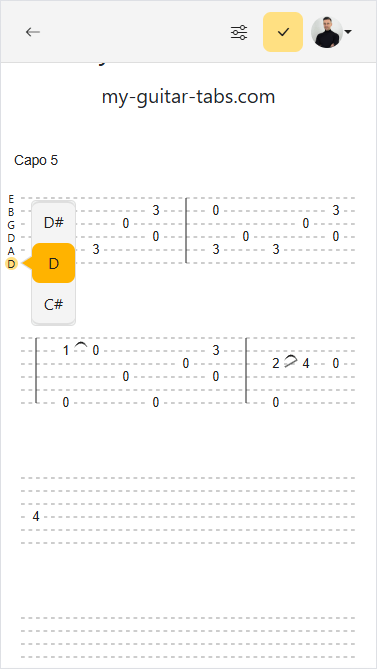
Let’s say that you want to change the tuning of your song to dropped D:
- Press the tuning letter of the string that you want to change.
- Change the tuning up or down pressing the tunning selector.
- Press outside the tuning selector to close it.
Undo/Redo
At any point, you can undo or redo your changes before saving. Press the Undo and Redo buttons on the virtual keyboard to navigate through your changes.
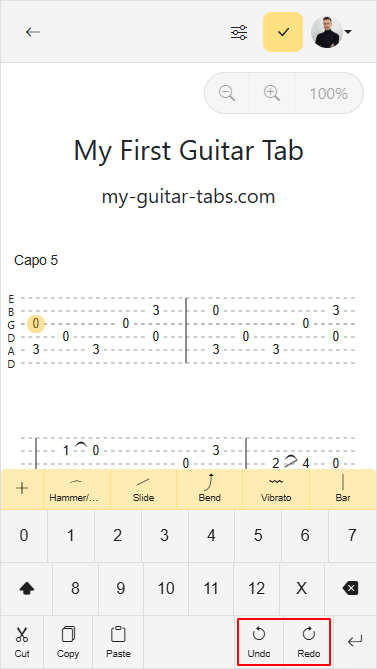
If you are using a physical keyboard, you can use the following shortcuts to undo and redo your changes:
- Undo:
Ctrl+z - Redo:
Ctrl+Shift+zorCtrl+r
Save
Save your new creation by pressing the done editing button:
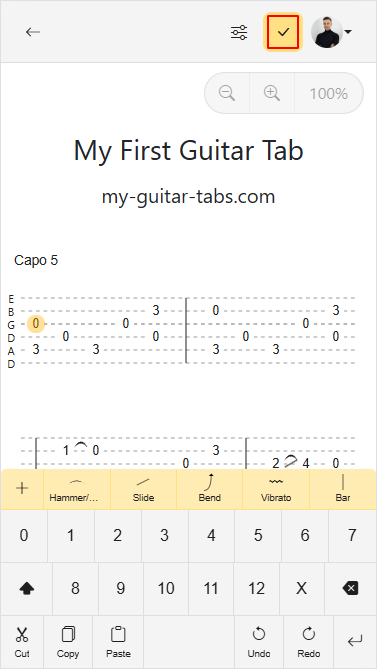
This will take you to the song viewer, where you can view and practice your new song:
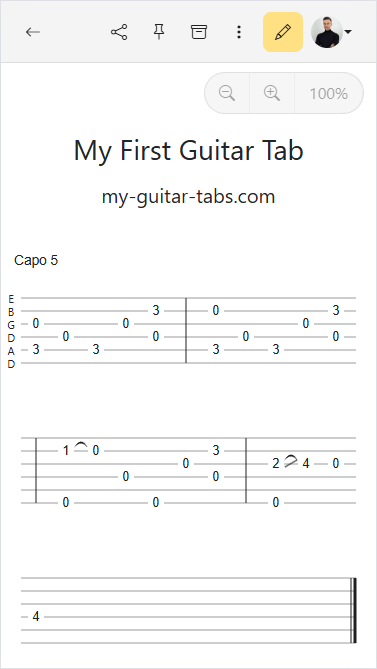
After saving a song, it will be available in My Songs:
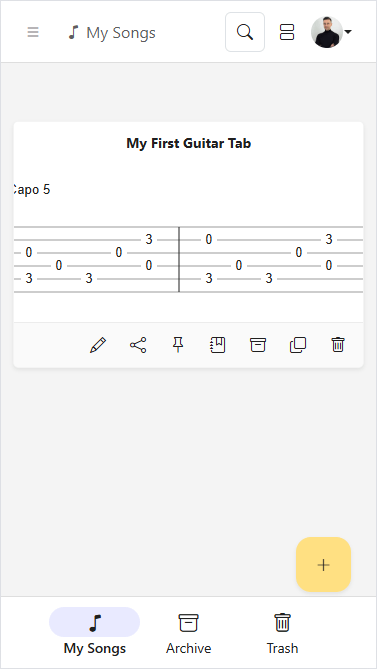
Congratulations! You’ve successfully created your first guitar tab in My Guitar Tabs. You can now share your song with others, continue editing it, or start a new tab from scratch.
For more information on how to navigate the editor, refer to the Editor Guide.